
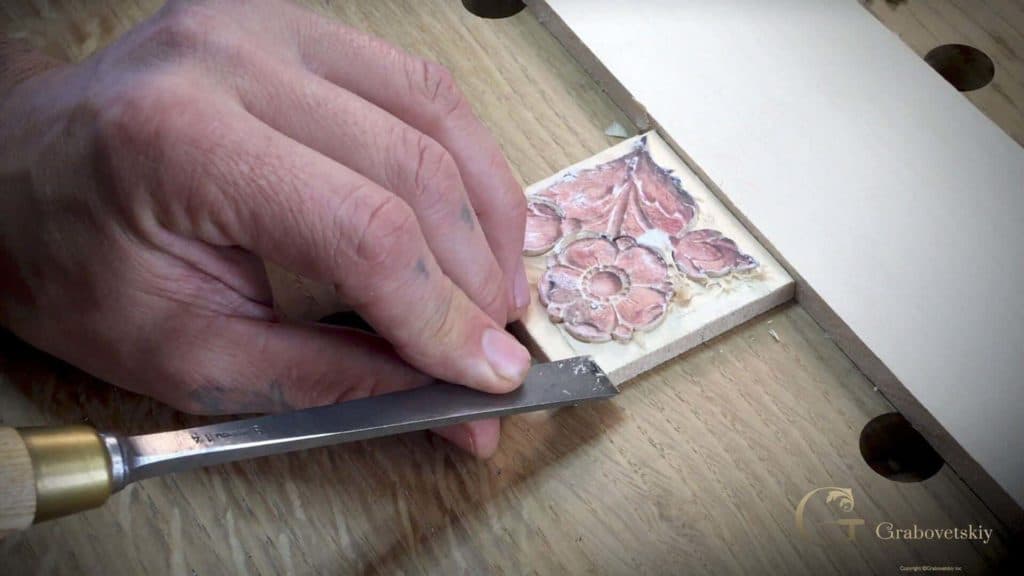
Alexander Grabovetskiy, woodcarver, School of Woodcarving · Published 2017
How do you carve the curl of a small flower without snapping it off?
Quick answer: Carving a curl without snapping it is a straight down stab with a gouge that matches the curve, given a light brass mallet tap and not muscled. On my main flower that was a number six, a quarter inch (6 mm), then a smaller sweep for the tight side.
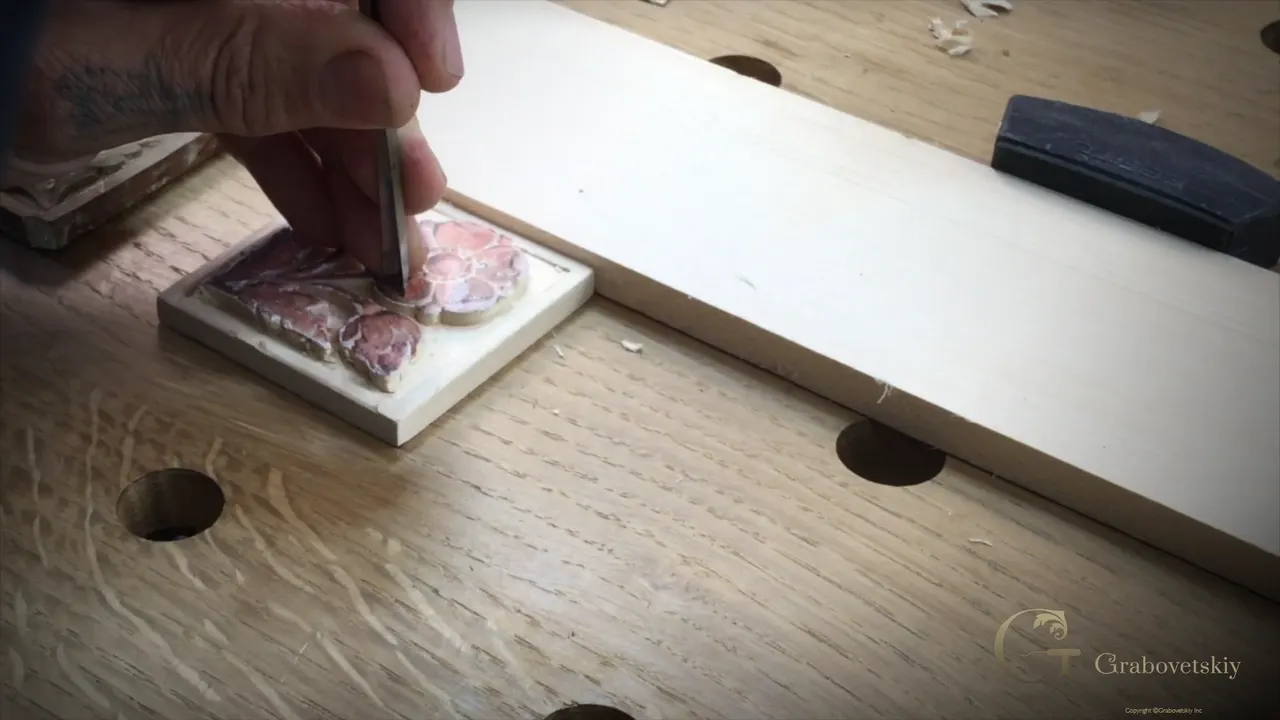
Carving a small flower so its curls stay whole comes down to a gouge that fits the curve, plus a light tap and a few small passes in place of one big push. That is how I started the main flower of the Flower Rosette, and it is what I explained on camera in part 3.1 of the third lesson.

Have you drawn a flower whose petals curl in toward the middle? Is it small enough that one hard hit could take a piece out? Then the plan below is for you. Every step of it is something I did at my bench or said about my other carvings, with the carving side of it laid out one move at a time.
What do you carve first on a curling flower?
The outline of the curls, before anything else. A curl that turns in on itself is kin to the volute, the spiral scroll of classical ornament. I opened the video with it: let's work right now on the main flower, and for that we need to establish the outline, those curls, which is curling kind of inside.
There were a couple of ways to do it, I said. One was to take just a V-tool, make the preliminary cut, and then take a small gouge and clean it. The other was to find the gouge first, and maybe I would not need any V-tool at all. I went with the second one.
To get there I went looking for the right profile. One gouge looked all right, although I thought another one would be better. That settled it: the number six, a quarter inch (6 mm), is actually an excellent fit. The curls got that gouge, in lesson 3 of Carving Flower Rosette.
How hard do you hit the gouge along the curl line?
Barely. I took a small brass mallet, placed it in my hand, and made my first passes just straight down. The goal at that stage was to establish the curl line.

I held back for a reason. I can't force it, I said, because a hard hit could actually damage it. I can snap out this part right here, and I don't really want that. Then came two more words: just slightly.
Why a brass mallet? I answered that in lesson 8 of the Hashemi flowers, because some of you asked about mallets. Most of the time I use a rubber one, and the main reason is that I am saving my handles. Sometimes I use brass. On harder woods like oak it is much easier with brass, I said, since it is heavier and smaller.
I also said that when I need just the micro moves, and I barely hit, the brass mallet still works better than the rubber one with the same amount of force. I added that I'm not always using it.
When is the V tool the safer first move?
When you feel safer with it. The video says so in plain words. Although if you feel safer, I said, just take the V-tool first, and cut a little away from the main cut. After that you make a clean pass. The center part comes out.

It is not that deep, I said, so the carving had to look like the original. No forcing on the second pass either, and the same gouge did the cleaning.
The course shows the same habit earlier. Lesson 2 has a weak point inside the flower, and I said that a punch that is too hard is going to snap it out. I wanted none of that. So a V tool went first, just to outline it.
A really good idea, I said, because the spots there are kind of weak spots, and it is good to outline slightly. I called it a relief cut, and the other side got exactly the same. That creates the outline, I said.
The knife does that job as well. In workshop 3 of the Antique Style Rosette I took my gouge over the edge and warned you to be really careful, almost not to touch the edge, because you can really easy snap it. A knife with one more pass takes the extra off easily, and that beats a mistake that snaps the line.

Those first passes were relief cuts there too, I said, and the reason would show on the next move. That move was end grain. Pushing it, I said, could easily snap this part right here, so I could not do that.
Which parts of a small flower snap off first?
The spots with little support behind them. I pointed to one in this video: a spot right here. I know it's simple, I said, but the piece has a lot of weak spots, and a hard push there lets this part be easily snapped out. We don't want to see that.
I worked around the spot. Just clean that, I said, and a little later: all right, it looks good.

A curl is a weak spot too. Near the end of the Hashemi flowers, in lesson 44, I went in with an even smaller concave tool, as far as I could, and said to be careful not to break that curl because it is fragile. Every curl like that creates a beautiful movement, I said.
Size matters too. Tiny parts came up in the bouquet lessons of the Furniture Panel, where I worked on tiny parts only about 10 millimeters, or about three-eighths of an inch, point to point. That is not much distance, and I said I really have to be careful.
The risky move was carving toward the center along the grain. Push too hard there, I said, and that middle part snaps out, which looks really bad. After that I shaped it into a half a sphere, like a dome.

Grain is the other half of the warning. On the Greek acroterion I picked up a small number seven and said I had to watch it closely, because that part can snap out if I'm not careful, because of the grain.
The Chamomile and Bow Rosette says it twice. Chamomile lesson one has me saying the sticking-up middle part could break really easily. The second has a number 2 straight down, with the words: just be careful, because my grain goes this direction. Chop too hard, I said, and I can knock down completely the whole thing.

Which tools and cautions sit side by side?
Here are five moments from this part and from the courses I quoted, each with the tool I held and the reason I gave you. The sizes are the ones I said on camera.
| Moment | Tool | Spot | Why |
|---|---|---|---|
| Curl line stab | Number six, quarter inch, small brass mallet | Curl line | Straight down, just slightly, no forcing |
| Safer first pass | The V tool, then the same gouge | Main cut | Kept a little distance from it |
| Clearing the center | The same number six quarter inch gouge | Curl center | Not deep, and not forced either |
| Tighter side petals | A smaller sweep, a number eight here | All petals | Work around, then the other side |
| Tiny tool, backside | Tiny Dockyard number eight, held in hand | Chamomile rosette | Do not press or crank it |
The last row comes from the backside of a piece in the Chamomile course, where I said smaller tools are safer if you are working from the backside.

How do you ease in when a part has no support?
With many small passes. Lesson 22 of the Hashemi flowers has me at a number seven, one inch (25 mm), with no support on the bottom. Be careful, I said, and don't press too hard, because you can easily break it. Just make multiple passes. That keeps it much safer, I said.
The words in lesson 21 were almost the same. Please don't press too hard, or it breaks easily, especially in areas with not much support. Comfortable with the smaller tools in an area like that? Then do exactly that, I said.

Back on the rosette, lesson 4 shows my knife at a really low angle, cutting away from myself, with my finger helping to push. I kept it under control, because too much push could snap this side, and that would be a big mistake. A couple of passes beat a snapped edge.
Flower Rosette lesson 1 stops short of the line. Hit it, I said, and you can easily destroy the flower part. The eight went in there, which I think is safer, rotated really carefully in a slicing movement.
Over in the Chamomile course, lesson 4 has a tiny tool held the way you hold a pencil, taking wood off without pressing. A mistake on the backside, I warned, can break the piece after hours of work, so don't press it and keep your hand off it.

How does the tight side of the curl change?
The gouge. After the first side looked good, I said I needed an even smaller radius, or a smaller sweep, to work this direction right here. For this side, I told you, I really have to use probably even number seven, or number nine, or eight.
I checked my number eight. Yes, I said, number eight does look good. It went around all of those petals, and I left that pass as it was and attacked the piece from the other side. Just go around, I said, and that should be fine.

A number nine did the same job in workshop 3 of the Antique Style Rosette. I was using number nine there, but you could use number eight, I said, and number seven if you wish. The right sweep for those spots turned out to be the nine already in my hands, and it fit perfectly.
Grain picked my direction in that workshop. For the background I looked for any pass against the grain and used it, because it is a lot safer. Workshop 1 had the same step: I checked my grain, said it was end grain, and went against the grain too, for the same safety, with a number eight or a number nine.
An edge that hits a wall can leave a ding. Workshop 5 had it. Too much push, I said, and the edge of my gouge will butt to the wall and make a ding, the kind I would rather skip. And if you have done it, I added, that's not a big deal at all. It's expected.

How shallow do the safest passes get?
About a sixteenth of an inch, in one case. In workshop 2 my knife sat on the line, guided by my finger, held almost like a pencil. I did not go as deep as on the first pass. The most I took was about a sixteenth of an inch, 1.6 mm, no more than that.

I would rather make two passes, three passes, I said, than make a mistake and snap it, because this section is only an eighth of an inch, 3 mm. Believe me, it's really easy to snap. I was on end grain there, and that is where I have to be really careful.
One more small size, a number 11 of one millimeter (0.04 in), turns up in the Modern Acanthus course. I turned the tool upside down and went in, with a warning not to push too hard, because that part breaks really easily. See that shadow, I said. That's what we are after.

Does a smaller tool make a fragile part safer?
Slower, and I said so. Sometimes I think it is safer to use smaller tools, I said in the Venice Room, like the micro tools by Dockyard. I know it is probably going to take a little longer with the smaller tools, I told you, but on the other hand it could be much safer.
My own hands need the same care. A Venice Room lesson shows my finger under an edge, so I would not use that edge as a leverage point. Crank too hard and dig too deep, I warned, and you can break your finger. It has not happened with me, I said, but I know it is possible.
The rest of the lesson repeats the point. I watched how deep I was supposed to go in part 3.2, since I don't want to overdo it, and my ring went even lower with that same number five in part 3.3.


What stays with me from a part this short?
Three moves came out of this part. The gouge has to fit the curve, which is why I look for the right profile first. The hit has to stay small, since too much force can damage it. And the V tool is there whenever you feel safer with it.
If you want the tools behind those numbers, All About Tools for Wood Carving lays them out. Edges have their own course, Carving Tool Sharpening. New to all of it? First Cuts for Beginners comes first. The rest sits on the Carving Flower Rosette course page, and the tuition for it is laid out on one plan page, called Tuition and Access.
Which curl on your own piece looks the thinnest to you right now?
How it's done
- Find the gouge that fits. Go looking for the right profile until one lies on the curl. For my curls it was the number six.
- Stab straight down, lightly. A brass mallet in the hand, first passes straight down, just slightly. I cannot force it.
- Take a V tool first if safer. Start a little off the main cut, then make a clean pass and remove the center.
- Switch to a smaller sweep. On the tight side I named a seven, a nine or an eight, then checked the eight, and it looked good.
- Work around, then the other side. Go around the petals, leave it, and attack it from the other side.
Frequently asked questions
How hard should I tap the gouge when a curl is thin?
Barely. I took a brass mallet and stabbed just straight down, slightly. I can't force it, I said, because a hard hit can take out the part right there. No number came with that, only the word slightly.
Should I start with a V tool or a gouge for a small curl?
Either works. I started with the gouge and said that if you feel safer, take the V-tool first and make that pass a little off the main cut. A clean pass with the gouge comes after that, still without any hurry.
Which gouge fits a curl that turns inward?
Side one took a number six. The tighter side asked for a smaller sweep, and I thought probably a seven, a nine or an eight. I checked the eight, and it looked good to me.
What to carve next