

Alexander Grabovetskiy, woodcarver, School of Woodcarving · Published 2018
Do carvers have a favourite gouge?
Quick answer: Carvers develop a favourite gouge for the length of a project rather than for life. On this flower panel a number 5 at 6 mm and a V tool numbered 16 get picked up constantly, and the next commission will hand that role to different tools. The work chooses, not the carver.
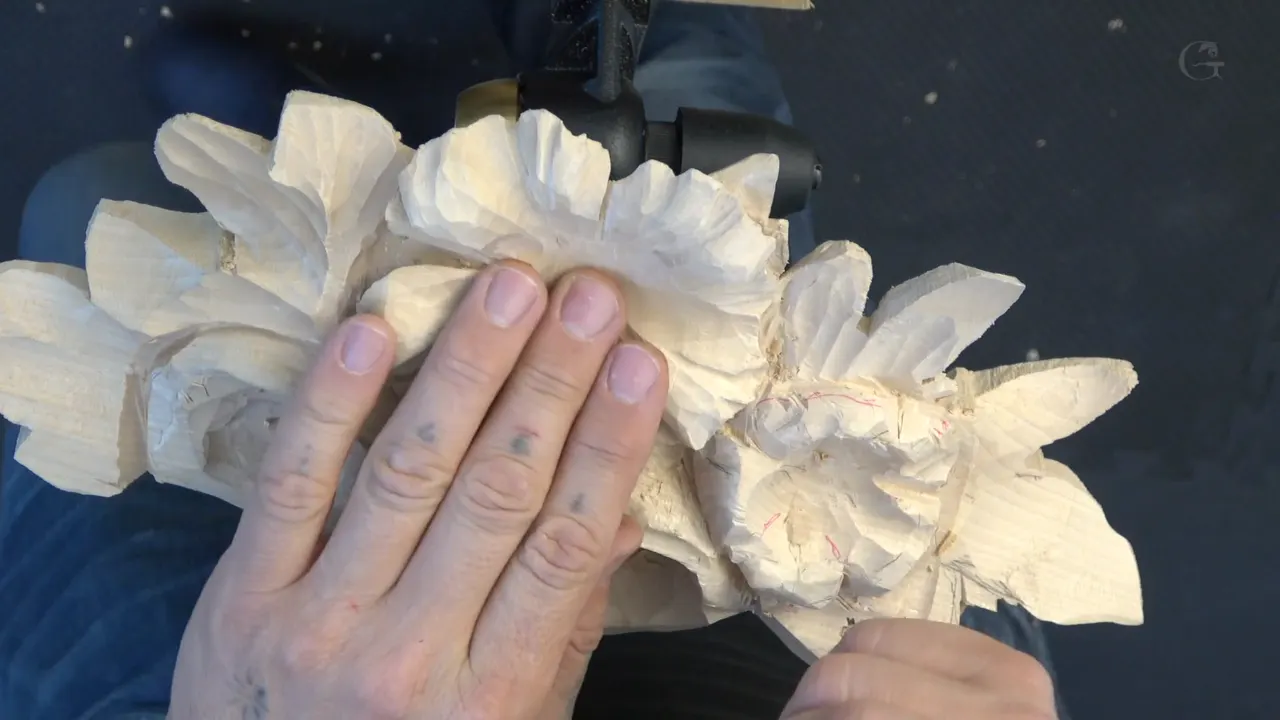
Only for as long as a project lasts. Anybody watching this lesson would swear the number 5 is mine, because I pick it up again and again, and on the next panel it will be some other tool entirely. A favourite belongs to the work in front of you, never to the carver.
Ever wondered which gouge a professional actually reaches for most? Did you expect a single answer? Ask three carvers and you will get three, and all of them will be telling the truth about their own bench. What settles it is the shape being carved, not taste.
Lesson 33 of the Hashemi flowers panel starts the remaining flowers from scratch, with the fishtail work of lesson 32 already behind it. Dividing, outlining, one spoon gouge, and the plain admission that I cannot always say why my hand chose a tool.
What the project decides for you
- Which sweep gets picked up thirty times a day, and which one never leaves the rack at all.
- Whether a bent tool is needed at all.
- How thin the wood behind a cut is allowed to get before a piece has to be left strictly alone.
- The order the cuts have to come in.
- Whether your hand reaches the rack before your head has finished deciding.
Do carvers have a favourite gouge?
For a while they do, and then it changes on them. Students watching this course would tell you the 5 at 6 mm is my favourite, because I reach for it constantly, along with a Pfeil V tool numbered 16. Both of those belong to this panel and this shape, and neither has any claim on the next one.

The next commission will hand the job to something else. A panel of deep acanthus wants 9 sweeps far more than shallow ones, a linenfold wants flat chisels, and a run of beads and berries hardly touches either, so the tool that lives in your hand follows the work rather than your affection.
Beginners get this backwards and buy the tool a video used. A gouge chosen because somebody else favoured it sits in a drawer for years, doing nothing at all. Buy for the shapes you actually want to carve.


Why does picking a tool stop being a decision?
Repetition wears the choice away. I said on camera that I cannot always explain why my hand goes to one tool over another. The longer I carve, the more often I catch myself simply picking up the right one, which is not mysticism but the ordinary result of doing something ten thousand times.

Watch a bricklayer pick a trowel. Nobody stands there weighing options, and the same thing happens to a carver somewhere along the way, at which point the interesting decisions move up a level to shape and shadow rather than steel.
Until then, think it through consciously. Lay the tool on the surface, look at the gap underneath, and choose the sweep that matches the curve you want, which is slower than instinct and gets exactly the same answer. That is precisely what the sweep numbers stamped on the blade are for.

Which tools did one flower take?
Ten or more, and one of them bent. The count surprises people, though every stage on a flower asks for a different curve, and swapping tools costs seconds while forcing the wrong one costs a petal.
| Stage | Tool | Note |
|---|---|---|
| outlining | a Pfeil 16 V tool, 6 mm | went in first and felt too tight in one corner |
| lowering a leaf | the 7 at 10 mm | cuts do not need to be clean yet |
| cleaning inside | the 5 again | a deeper excavation means more shadow behind |
| reaching the floor | an 8 mm spoon, any bend will do | the one bent tool of the day |
| deep concaves | 9 sweeps, an eighth of an inch and five eighths | big movements first, small ones later |
| smoothing | the 4, and a 7 at 20 mm | never quite smooth |

A parting tool is what the V goes by in some shops. Same tool, older name, and it does the outlining here before anything else happens, which I set out properly in lesson 22. A three millimetre one would have suited one corner better than the quarter inch I had in my hand.

Only one bent tool appeared all lesson. An 8 mm spoon went in to reach the floor of a hollow, and I said out loud that any spoon would do, because the bend matters and the exact size does not. Unbent tools handled every other cut that day, exactly as they did in lesson 20.

How many kinds of flower belong on one panel?
A few, and no more than that. This flower is a different type from the big one beside it, yet I keep its first ring semi similar on purpose, because nature offers hundreds of forms and a panel that tries to show them all stops being ornament and starts being a catalogue.

A few types across a whole composition is my limit, and I do not count them precisely. The eye needs enough difference to stay awake and enough similarity to read the panel as one thing, and that balance is a design decision settled on paper long before any gouge appears, which the design course takes apart properly.
Within a type, make every single one different. Same family, different individuals, which is exactly how a hedge looks. That distinction between kind and instance is worth more than any technique, and it is the argument running under lesson 26 as well.

A marker sometimes beats a pencil for this stage. Graphite skips across the facets a gouge has left and the line disappears into a hollow where you cannot see it, so I keep both within reach and use whichever one grips. Look at the right hand flower in these frames and the second colour is red, which is simply what I had.
Why can the first cuts be dirty?
Very little at this stage survives to be seen. I mention in the video that the cleanness of the cuts was not on my mind, because every surface being made now gets reshaped two or three times before anything final happens, and polishing a shape you are about to move is wasted effort.

What does matter now is position and depth. Get a leaf low enough, get a boundary in the right place, and leave the quality of the surface until the form underneath has stopped changing, which is the order of work every trade uses whether it carves or builds.

Beginners invert this and pay for it twice. Hours spent smoothing a petal that later has to drop three millimetres is time thrown away, and worse, a smooth surface hides the shape from you while a rough one shows every plane honestly. I keep them rough on purpose until late.

Bigger sweeps carry that stage. A 9 at five eighths of an inch moves real wood, a 7 at three quarters follows it to smooth the long movements, and both of those come out before any small tool does, exactly as they did in lesson 29.

What is a wall in carving?
My own word for the surplus standing inside a form. When a hollow has been dug and shaped there is often a band of wood left upright around its inside, doing nothing, and taking those walls away is what makes the hollow read as a hollow rather than a dish with a rim.

Nobody taught me the term and no book I have read uses it that way. It happens to be what I say while working, and students pick it up within a lesson or two, which is how most of the vocabulary in any trade actually spreads.
Finding them takes a change of angle. Turn the panel until light rakes across the inside of a flower and every wall shows as a bright line, and the 5 takes them off in one pass each. A hollow gains most of its apparent depth right at that moment.

What does a carver mean by a flip?
A reversal in the direction a surface travels. A petal running downhill that suddenly turns and climbs again has a flip in it, and I put several into the flowers on this panel, upward then down then backward again, because a surface travelling one way for its whole length looks dead.

Concave and convex do the same work under duller names. Every one of these flowers is built from nothing but those two shapes in alternation, which sounds reductive until you try it and see how much variety two shapes will hand you. Acanthus works the same way.
Where a flip goes is your decision. I chose one side over another on this flower purely because that side looked better at the angle I was standing at, and I said so on camera, which is a poor sounding reason that happens to be the real one.

How do you tell a piece is too weak to touch?
Feel behind it and read the grain. One petal on this flower had already been hollowed away underneath on two edges, leaving it standing on almost nothing, and I said plainly that pushing on it would snap it off. So I worked around it and left it alone for the rest of the session.

Numbers help until they run out. Under one section there was about 5 mm of wood and no more, and grain running the wrong way across that leaves a weak point no measurement fully describes. Read the grain direction first.
Elsewhere on the same board there was plenty. I noted that one area had thickness to spare and could go deeper if I wanted it to, which is the other half of the skill: knowing where you are rich as well as where you are poor.

Why does none of this make sense while it happens?
Shapes only resolve at the very end. I told the camera that what I was doing would not make sense yet and to simply wait, and that is honest rather than evasive, since a flower at this stage is a set of unrelated hollows and nothing announces what it will become.

Students quit here more than anywhere else. The panel looks worse than it did an hour ago, the shapes are lumpy, and the drawing pinned above the bench bears no resemblance to the wood, all of which is normal and none of which is comforting at the time.
What holds you steady is trusting the order of work. Rough shapes, then movements, then detail, in that sequence, every time, and the reason I leave every fumble in these videos is so nobody thinks it arrives cleanly for me either. Lesson 31 has a good example, and so does lesson 24.

When should you stop pushing a cut?
The moment you feel it resist. On a flower you cannot keep every cut running with the grain, so you will meet places that fight back, and the answer is never more force. Come at the same spot from another position and use a run of light passes instead.

Sharpness is the other half of that. Check the edge constantly and strop it the moment it needs stropping, because a tool that requires pushing has already told you what is wrong, and forcing it on a petal 5 mm thick ends one way.

Many small cuts beat one heavy cut nearly always. They are slower to read on video and faster in practice, and the finish they leave needs less repair afterwards, which the old shops understood better than we do. You can read it in the surfaces of any relief panel that has survived three centuries.
Where this leaves the panel
A second flower roughed, shaped and flipped, with the rest queued behind it. Every one gets the same treatment and every one will come out different, which I promised back in lesson 30 and which the wood delivers without my help.

Variety was the one thing I chased on purpose. Not every petal goes under its neighbour the same way round, some flowers sit lower than others, and that unevenness is what stops a panel of four flowers reading like wallpaper. Grinling Gibbons clearly understood it, judging by how little of his foliage repeats, and the sculpture rooms at the V and A show what it buys you.

Tool marks stay. Every facet makes the thing look better to my eye, nothing here gets sanded, and smooth is not what I am after, which is a taste and not a rule. Argue with me if you like.

All 49 lessons of this panel sit behind tuition at the school, cut from basswood, the lime that every panel course here is carved in. My tools are a mixture, mostly Ashley Iles with Pfeil among them, and Henry Taylor is the other name worth knowing. None of that proves anything about what yours should be.
How it's done
- Outline with a parting tool. Run a V tool round the shape first to set its boundary. A quarter inch works on most of a flower, though a three millimetre one reaches a tight corner better.
- Lower whatever is in the way. Drop any leaf or shape that fouls the flower using a shallow sweep at around 10 mm. Cuts do not have to be clean at this point.
- Check the thickness and the grain. Feel behind each section before undercutting. About 5 mm of stock with grain running across it is a weak point, and anything already hollowed underneath on two edges must be left alone.
- Clean the inside and take the walls off. Turn the panel so light rakes across the hollow. Every band of surplus wood standing upright inside shows as a bright line, and a quarter inch sweep removes each in one pass.
- Put flips into the surfaces. Make a surface change direction, up then down then back again, so it never runs one way for its whole length. Three or four per flower is enough.
- Stop pushing the moment it resists. Move to another position and work with a run of light cuts rather than one heavy one. Strop the edge as soon as a cut needs force behind it.
Frequently asked questions
Which gouge do professional carvers use most?
Whichever one the current job keeps asking for. Shallow sweeps dominate flower work, deep ones dominate acanthus, and flat chisels dominate panelling. A carver halfway through a project will name a tool that changes with the next commission.
How many gouges does one carved flower need?
More than ten on this one, including a single bent tool. Every stage wants a different curve, and swapping costs a few seconds while forcing the wrong sweep can cost a whole petal.
What is a parting tool?
An older name for a V tool, still used in plenty of shops. It goes round a shape first to establish the boundary, and a narrow one reaches into corners that a quarter inch blade cannot enter.
What to carve next