
Alexander Grabovetskiy, woodcarver, School of Woodcarving · Published 2024
How do you decide which branch goes over the other in a carving?
Quick answer: Choosing the top branch is naming the main one first. On my grape onlay the main branch rides above, and a section of the second slips right underneath it. Tying them in a knot, under and then flipping above, would have made sense as well. Where another branch had no space to drop lower, it went over a grape.
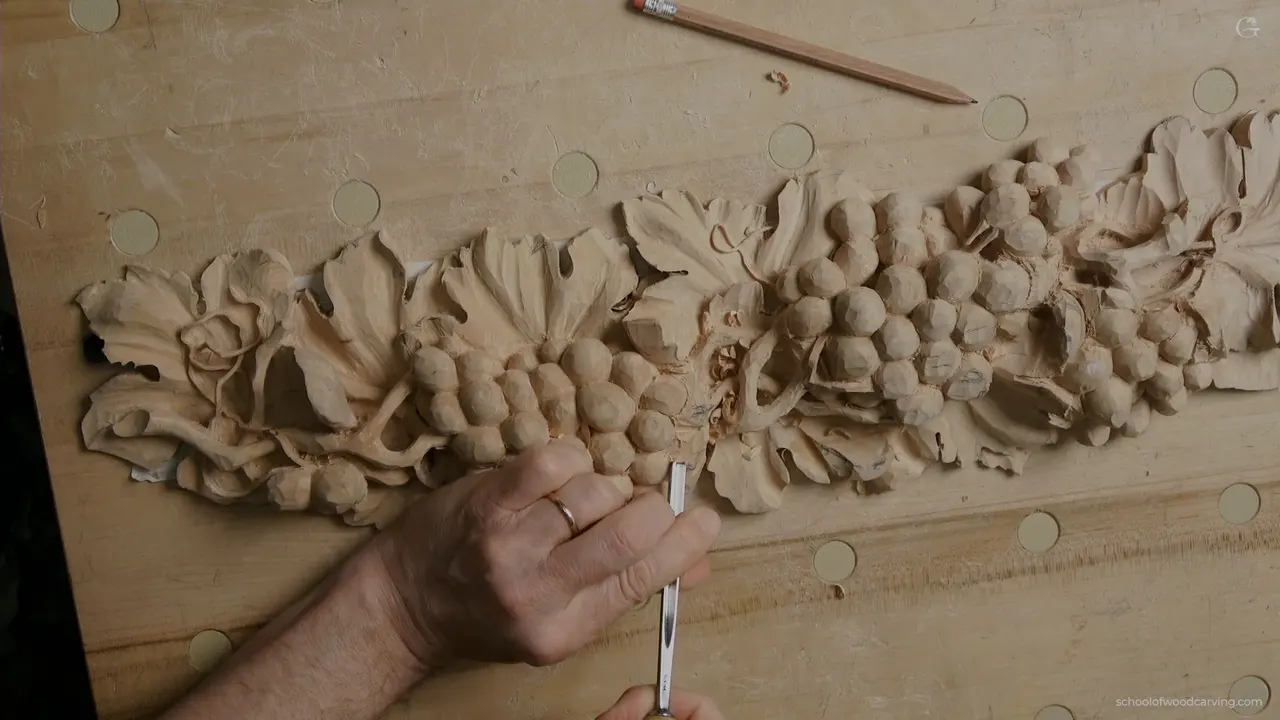
Deciding which branch goes over the other is naming the main branch first. On my grape onlay the main one rides on top, and a section of the second one slips right underneath it. I settled that before the first outline and changed part of it halfway through. So if you want to know how to carve vines in wood where two of them cross, that choice came first for me, in part one of lesson 11 of the grape onlay course.
Got two branches on your board, running in two different directions? Do they have to meet near the grapes? Then one has to give way. Below is what I weighed, where I rethought my outline, and what I did with a branch that had no room left to drop. You'll also see the same kind of choice on three other pieces of mine, the Venice Room, a lily box and a furniture panel, with the reason I gave each time.

Six notes on over and under
- The main branch takes the top spot.
- Tying them in a knot, where one dives under and then flips above, would have made sense too, and I said so.
- Halfway through the outline I had to rethink.
- I let one branch die somewhere on the inside, past a grape that sticks out.
- With no space to drop lower, a branch rides across a grape, and the grape sits to the side.
- On a Venice Room panel both ways would have looked good, and logic still chose.

Which one is the main branch?
The one that rides above where the two meet. Two branches came at this cluster, one heading that direction and one heading this direction. I liked what I saw so far. Then I said one of them didn't make sense, and took it back in the same breath, because it did make sense, it just ran the other way.
I was okay with the movement down to one bunch. With the other movement, not so much. A couple of motions were already marked on the board, the ones that would connect this bunch. So the decision I had to make was which branch would be the main one, with a branch right here and a branch right there.

Why not tie the two branches in a knot?
A knot would have worked, and I said so. Logically, to make it more complex, I could bring one branch from below, take it under, then flip it above, so it goes up and then down while the other branch passes right underneath. That would make sense. I carved a knot of tendrils on this same onlay back in lesson 4. Interlace, as Wikipedia describes it, is bands looped, braided and knotted in complex patterns, and it shows up in medieval art.
But there was a second way. My main part could go above, with just a section of it slipping right underneath, wherever I had marks. That one was probably going to make more sense for me, I said, so it's the one I started to outline.

What made me rethink the outline?
Worry about how the other branch would look. I picked up my favorite number 11, as always, a five millimeter one, three sixteenths of an inch, and started on the main movement. You've got to be careful how you do it. I could go lower there, I said, because part of it was passing underneath this branch, but I also wanted to be sure I wasn't messing up the look of the other one. How would it look? I think I have to rethink, I said.
My fix was small. So the main one would go even lower. And there would be two separations right there, a copy of the two separations I already had at the top. More logical, I thought, and I said I hoped it made sense.

Depth had a limit, too. I had plenty of material and no problem taking it a little deeper, but not too deep, because I had already excavated on the bottom. Next I did the other side the same way.

Where does the lower branch go?
Inside the wood, where it dies out. There was a grape sticking out right there, so I wanted that branch to die on the inside somehow. I lowered that side, saw I could lower it even more, and liked how it looked so far. That branch went this direction and was dying somewhere right there.
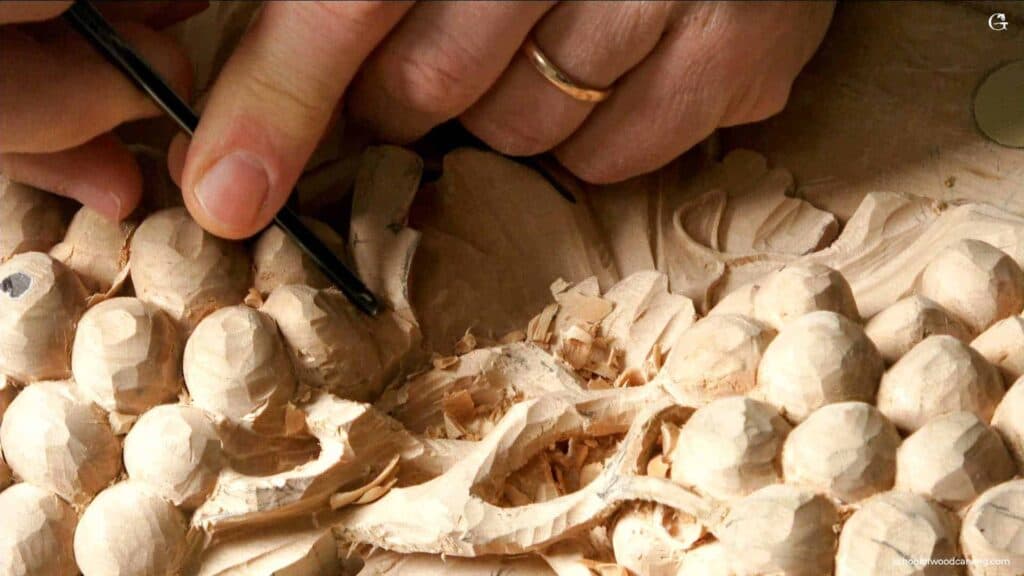
Now the second one, the branch that passes underneath from the other side. I rotated the board and took it from there, a much better position for me, using that number 11 at five millimeters again, exactly the same thing. Beside it sat a grape, and I didn't want to damage that either. After lowering the wood, I went underneath that grape a little bit, too.

Under the high spot I had left approximately half an inch (about 13 mm) of wood, so I could excavate right through and make it airborne right away. My number 9, one eighth of an inch, three millimeters, went down from one side and then from the opposite side, like a plug cut. It went through, and I made the hole a little wider.
At another spot a number 8, about 10 millimeters (about 3/8 in), went straight down and maybe pointing slightly inward, so the undercut would be a lot easier. I wasn't poking with it. In slow motion you'd see I was slicing, so I wasn't pushing the whole wedge in.

When I shaped that branch, I made sure it ran kind of underneath the main bunch. That's more logical, I'd say. Too straight wouldn't look good either, so I wanted some curvature in it.

What happens when there isn't space underneath?
It goes over. Near the end of this part I still had another branch and had to think about what to do with it. The wood there was meant for grapes. Logically, I didn't have enough space, and looking from the side and then from above at the same spot told me the same thing.
Lowering that side more was the logical move, and I couldn't do it. So that part of the branch goes right at the top of the grape, and the grape sits right on the side. My number 3 gouge came out again, about 11 millimeters, a little bigger than three eighths.

That number 3 is an antique. It probably used to be half an inch (about 13 mm), or maybe 12 millimeters (about 0.47 in), and I like it for its steel. Earlier, shaping a grape beside these branches with that same number 3, I didn't go so deep, because I still wanted the grape to connect to those branches. With the same tool I cleaned up a little and gave it sharper edges, or better edges, I should say.
Should every leftover gap get a branch?
One spot on this onlay didn't. A little section still had material in it, and I could make a small branch there, which probably wouldn't make any sense, or excavate it and create a really dark spot. I left the branch out. The tool that fit the narrow spot was a two and a half millimeter number 11, smaller than one eighth of an inch, and shadow looked much better there. I could get very deep.
Seen from above, the dark spot was there, and I think I made the right decision. One grape still bothered me, though, so I went a little deeper under it.

How to carve vines in wood that cross each other
Real grapevines twine. Vitis, the grapevine genus, is about 80 species of twining plants, Wikipedia says, and a tendril is a thread-like stem, leaf or petiole that climbing plants use for support and attachment. In wood carving, on a relief panel, the eye reads a crossing as depth. Wikipedia's page on depth perception calls it interposition when near surfaces overlap far surfaces, one of the cues we judge distance by.
So I kept checking that overlap from more than one side here. Before the outline I looked from different angles. Side view and top view both came before I gave up on a branch passing under, and I walked around to check once the hole went through. One camera showed it really well.

How did I choose overlaps on the Venice Room?
Mostly by logic, and once by where the panel would be seen from. In workshop 71 of the Venice Room two parts met at an eye, and my question was what should overlap. This one over this one, or that one over that one? Both ways were going to look good, I said, but logically I thought that part should overlap this part. I set it in with a number 11 of 5 millimeters (about 3/16 in), the same job I had done many times, and came at it from the opposite direction as well. Where the two met I had a ridge to take care of, and straight tools weren't too convenient there, so I tried a skew.
Workshop 66 asked the same thing. I have to question myself, I said. Is this supposed to overlap that part, or the opposite? Logically, this part goes over that, and a 3 mm (about 1/8 in) number 11 set it in with some relief cuts. I didn't want to go too deep there, though, because I had a lower part I did not want to lose.

In workshop 69 I had to decide whether part of an acanthus head would lie over the main body, or the other way round. The panel would be visible from the bottom, so overlapping the main body made more sense, I said, and I could get an extra division inside. I wasn't going too deep, maybe 3 millimeters (about 1/8 in), or I'd lose my feel of a sphere.
A different reason came up in workshop 93. One part went underneath the line beside it, logically, because it's like stepping down, and that looks much better. And in workshop 42 I said it in one breath, since this goes above that one, this part goes above this one too.
Does a hidden stem still have to go somewhere?
Logically it does. My leaf in workshop 96 had three main divisions to follow, and a main stem which logically is supposed to go somewhere, to another stem, and stay hidden somewhere underneath. The leaf had to connect to that stem as well. Let me start, I said, and we'll see how it looks.
Workshop 99 had the same kind of stem. It went somewhere underneath, right there, where a leaf would cover it very much. One area was going to be all waste. That stem would run all the way over here, so I took a number 11, ten millimeters, three eighths of an inch, and established the stem first.

What about thin stems on smaller pieces?
On the lily box, lesson 2, a small leaf flips above a stem. I took a one millimeter number 11 (about 1/25 in), worked both sides and brought that stem inward. Losing the overall movement doesn't worry me, I said, because with the same tool I can always bring the main form back. Another stem had to go underneath of another one, so a number 5 went in, kind of underneath.
That's when I said it's a good idea to keep a reference picture close by. I leave those papers right on my workbench, if you can call my space a workbench. It's not really a workbench.
A little later I wanted to keep my main stem high enough. The small leaves didn't have to be 100% that form. They could move with some freedom, and changing their design a little should not be any problem. Close enough to the design, I said, but not too crazy about it. Then a number 7, marked as 6 mm (about 1/4 in), went in to undercut underneath, whatever tool you can fit.
On the furniture panel, lesson 20, a stem would pass underneath some flowers. Before I adjusted it, I wanted the line beside it to keep running, invisibly, in that same direction, like a tangency, one continuous line. After that I could adjust the stem, whatever it turned out to be. That section was a volute, which Wikipedia calls a spiral, scroll-like ornament, and I saw a few different ways to develop it.
Six crossings on four of my pieces
| Piece | Choice | Note |
|---|---|---|
| Grape onlay 11-1 | main branch on top, a section underneath | probably made more sense |
| Same onlay, later | a branch went over the grape instead | not enough space below |
| Venice Room 71 | one piece overlaps another at the eye | both ways looked good |
| Venice Room 69 | part of acanthus head over the body | visible from the bottom |
| Lily box 2 | a stem goes underneath of another one | reference picture kept close |
| Furniture panel 20 | a stem runs underneath of the flowers | one continuous tangent line |

The first part of lesson 11 shows both branches go in, the rethink and all, right up to the grape under the last branch. It opens with Access, along with the rest of Carving Grape Onlay.
How it's done
- Look where each branch runs. Two branches came at this cluster from two directions. I was okay with the one going down to the bunch, and not with the other movement.
- Pick the main branch. One of them rides on top, so I named it first.
- Weigh a knot against a plain crossing. One option dives under and flips above. I chose the main part above, with some of it slipping underneath where I had marks.
- Outline the main movement. My 5 mm (3/16 in) number 11, carefully, a little deeper, though not too deep, because the bottom was already excavated.
- Let the lower branch fade. It dies on the inside past a grape. I rotated the board to reach the second one from its own side.
- Go over where space runs out. With no room to lower that side, the branch rode over the grape.
Frequently asked questions
Does it matter which part of a carving overlaps the other?
Either way can look good. I said exactly that on a Venice Room panel where two parts met at an eye, and logic picked one anyway. Here on the onlay my main branch took the top spot and the other went partly under.
Should crossing branches be carved as a knot?
Sure, a knot works. One branch goes under and flips above while its partner runs right underneath, which makes the cluster more complex. I went the other way here, main part above and some of it below, since I thought that would probably work better for me.
What do you do when a branch has no room to drop lower?
I put it over. Late in part one another branch was left, and from the side and from above I could see there wasn't enough space. Dropping that side any further wasn't possible, so the branch went over a grape, with the grape sitting right beside it.
What to carve next