

Alexander Grabovetskiy, woodcarver, School of Woodcarving · Published 2024
Do you have to carve grapes exactly where you drew them?
Quick answer: Moving a grape off its drawn spot is, on my grape onlay, part of roughing in the bunch. Lowering everything below the high spot took my drawn grapes away, and I said not to worry. Redraw them, and they don't have to be at the same location. The spots where grapes touch told me where the next one goes.
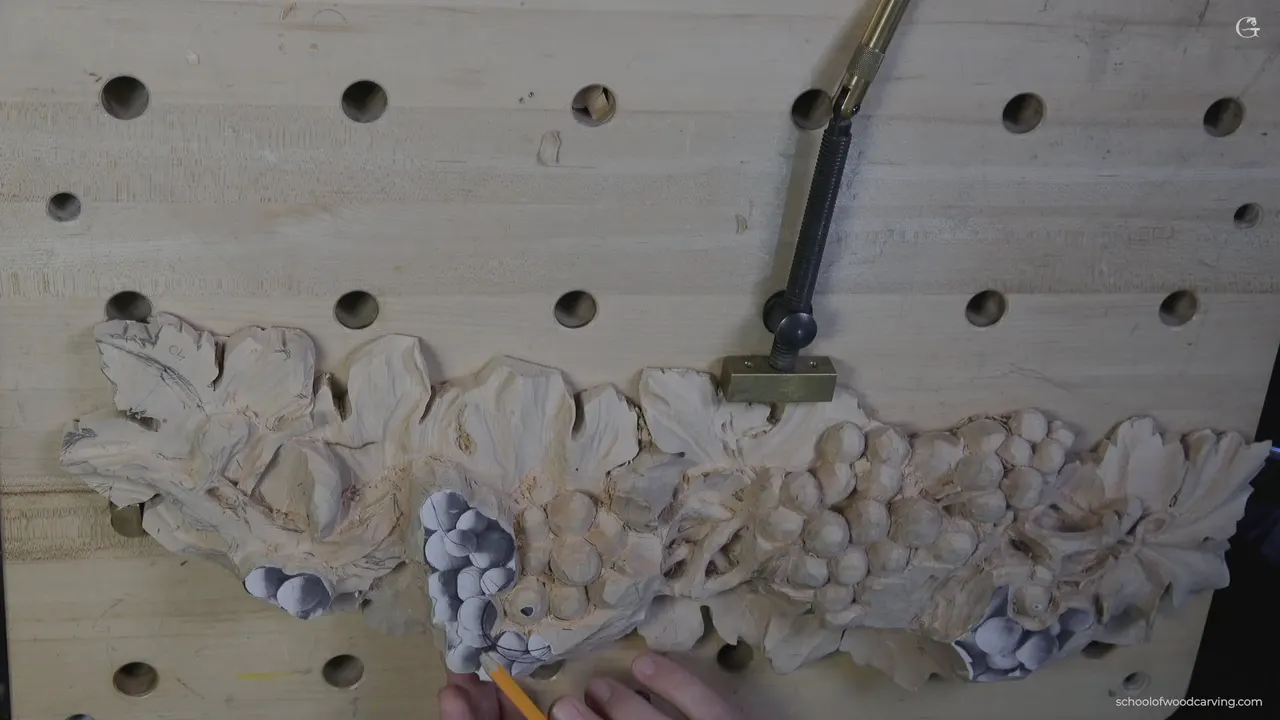
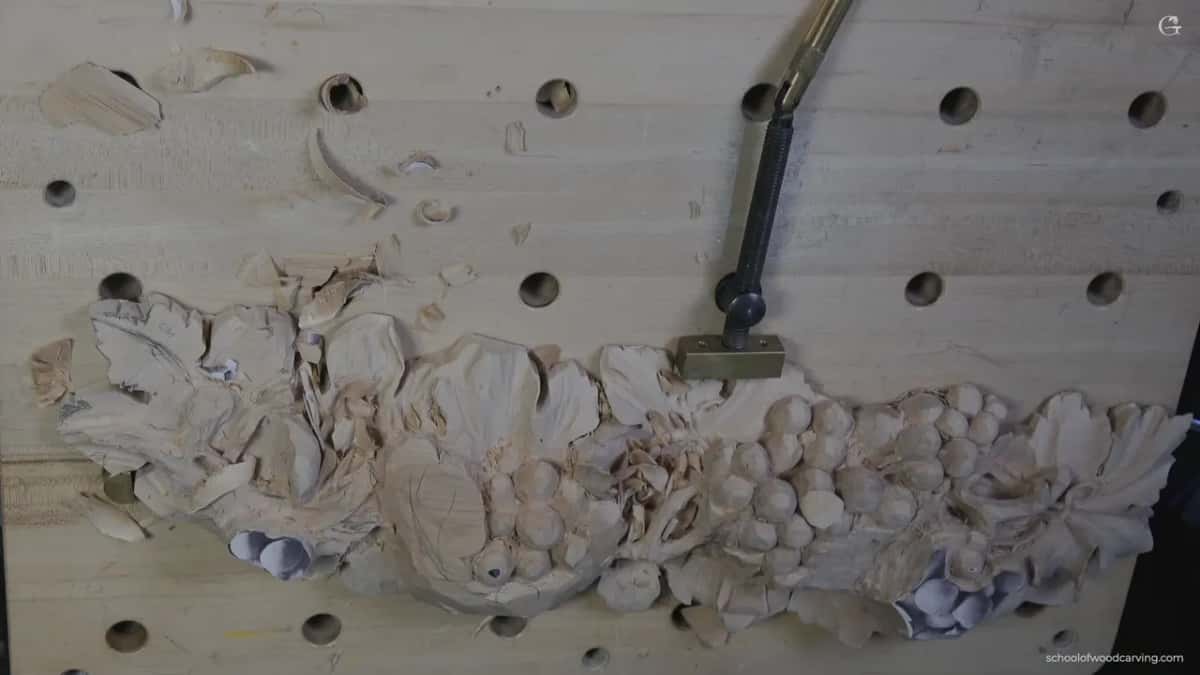
Placing a carved grape is, on my grape onlay, a choice I keep making in the wood while the bunch takes shape. Welcome back. This video picks up on that same part of the panel, and the grapes on my drawing went away as I lowered the whole bunch. I told you not to worry about it. Redraw them. They don't need to sit at the same location. In this wood carving grapes design, the spots where two grapes meet showed me the position of the next one.
Is there a drawn grape on your board right now? Does the bunch around it still have to come down? Then lower the bunch anyway, and draw that grape again where it looks right.
It can feel wrong to carve away a line you took the time to draw. I even said on camera that maybe I say this too much. Part one of lesson 2 runs about twelve minutes on one bunch of grapes. You'll see what happened to my drawn grapes there, what I watched instead, and where a line is still worth keeping.
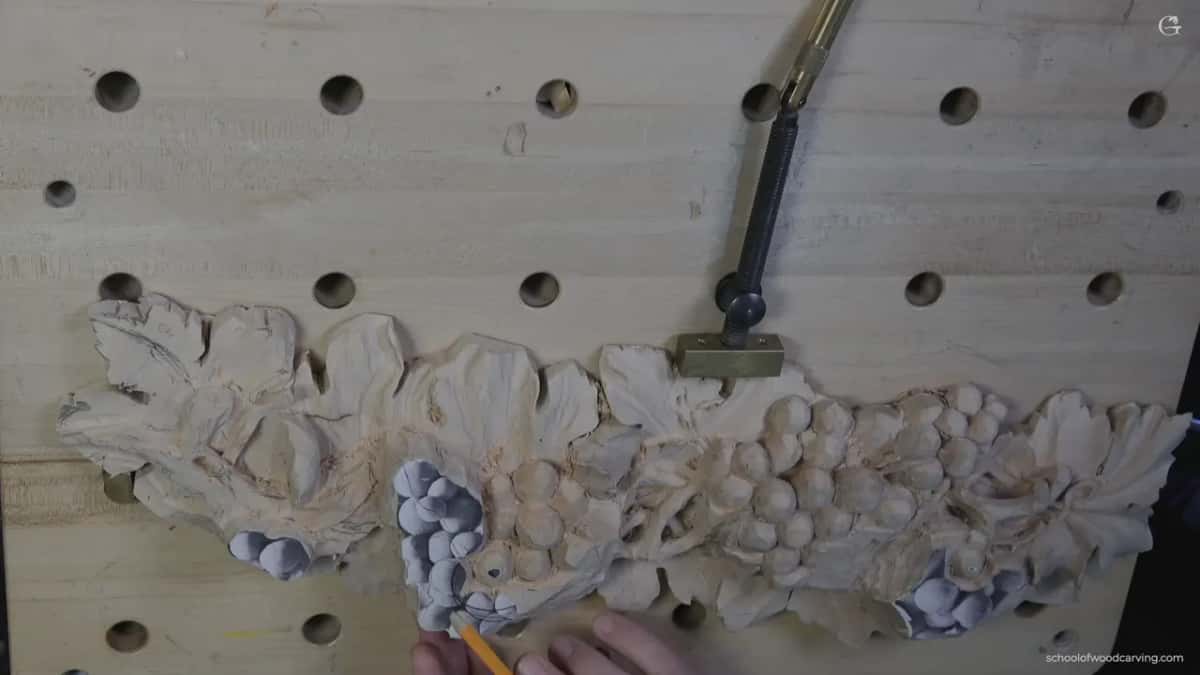
What happened to the drawing on this bunch
Shape the whole bunch first, in three dimensions, and check it from several sides.
Everything below the one high spot came down, and the drawn grapes went with it.
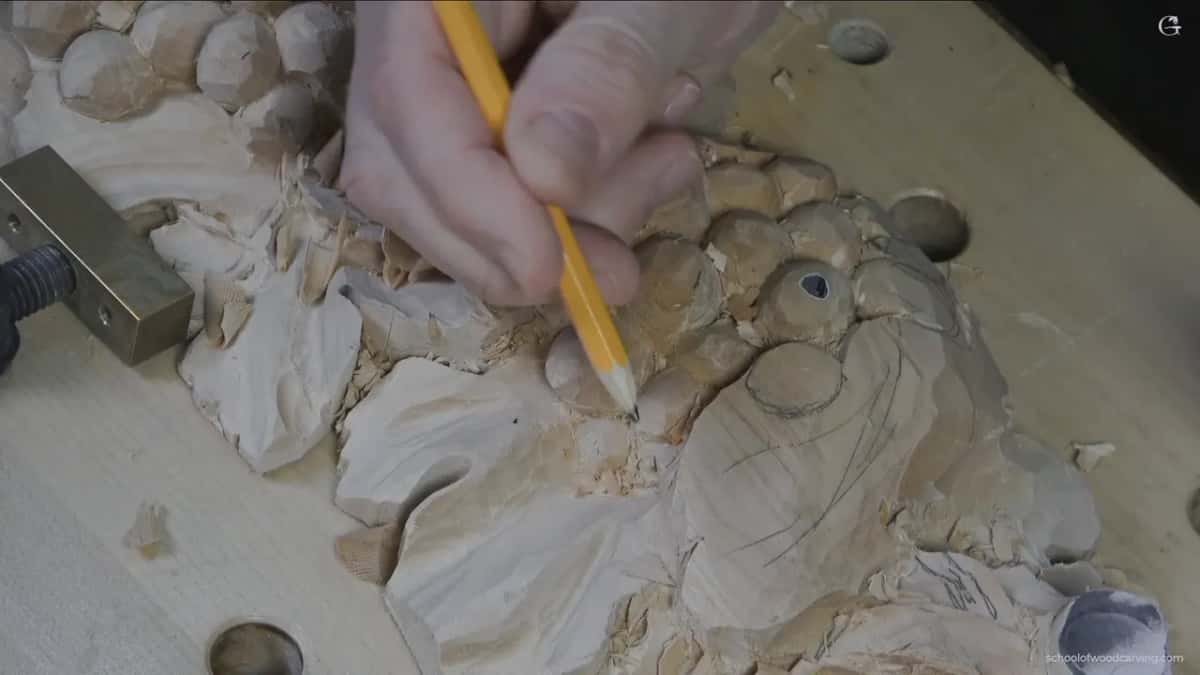
Don't worry about that. Draw them again in the old spot or a new one.
Opening the places where they touch pointed me to the next grape.
Aim for a triangle there. When a spot can't give you one, it's all right.
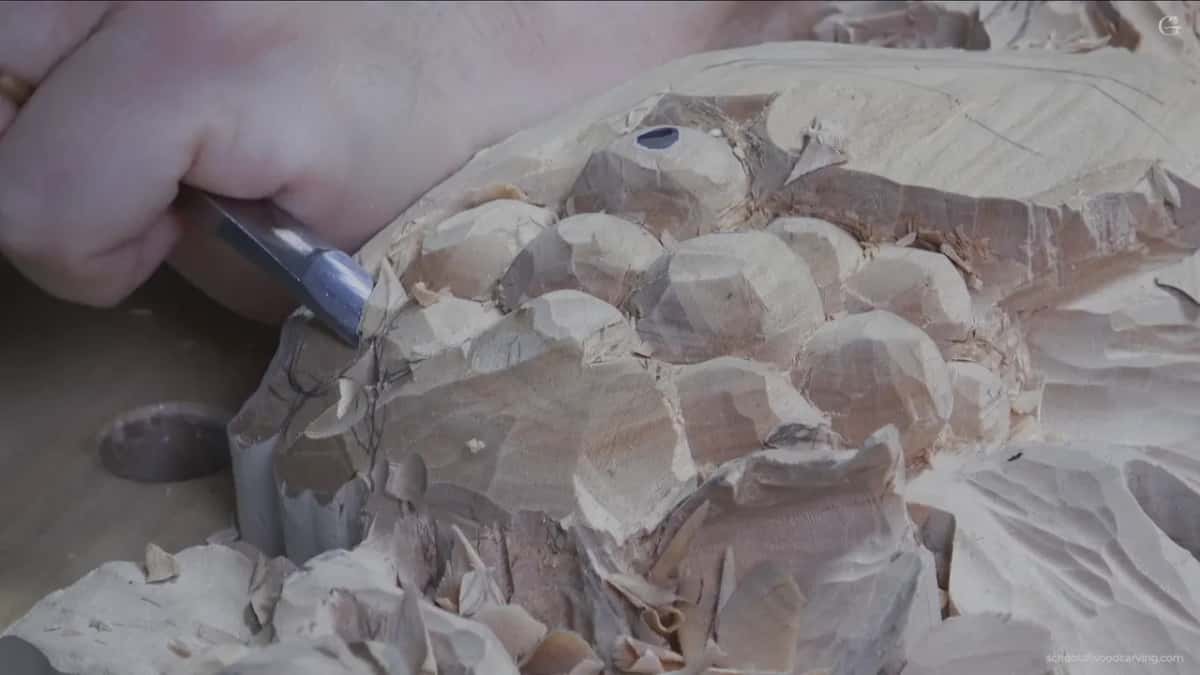
Dig in with the corner a little at a time, so the grape next door stays safe.
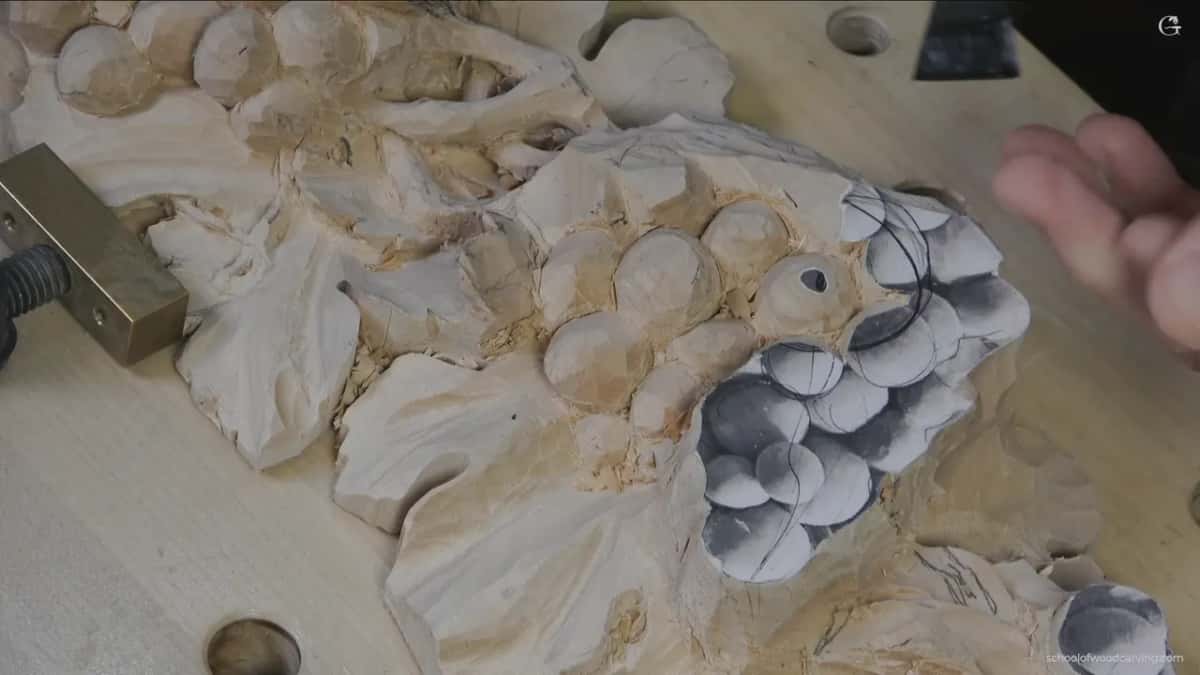
Why do the drawn grapes go away?
Lowering the bunch takes them with it. If you remember, I set the high spot on one grape, and that means I have to lower everything else, otherwise it won't look good in 3D space. At the start of this video the bunch still had its full depth, the full inch and seven eighths, and all I wanted from it was some roundness.
Please, please understand one thing before you carve any of those grapes. Look at the shape of the whole bunch and how it will sit in three dimensional space, and leave the single grapes for later. Check it from different points of view, too. That way you know exactly what changes you have to make.

For the lowering I used a skew, about an inch (about 25 mm), I would say, because I like how quickly it blocks the thing in. Bigger tools are always better for this, like a number 2. There is one more tool I like for the job that is not always easy to find, so I sent you to search the Tools for Working Wood site for it. A normal gouge will do the same work, and a skew is not a must. Personally, I really like it.

Even with that flat tool I'm not pushing. I'm still slicing. If you watched it in slow motion, you would see the slice.

I lowered the whole thing some more and knew it needed to be a little tighter. Here you go. That is good. One more spot went a little lower after that, and then I could see where the grapes would meet.
Do the grapes have to go back where they were?
They don't. I told you one more time, right while the bunch was coming down. Don't worry about losing the details of those grapes, the individual grapes. Go ahead and redraw them. The new ones can sit somewhere else.
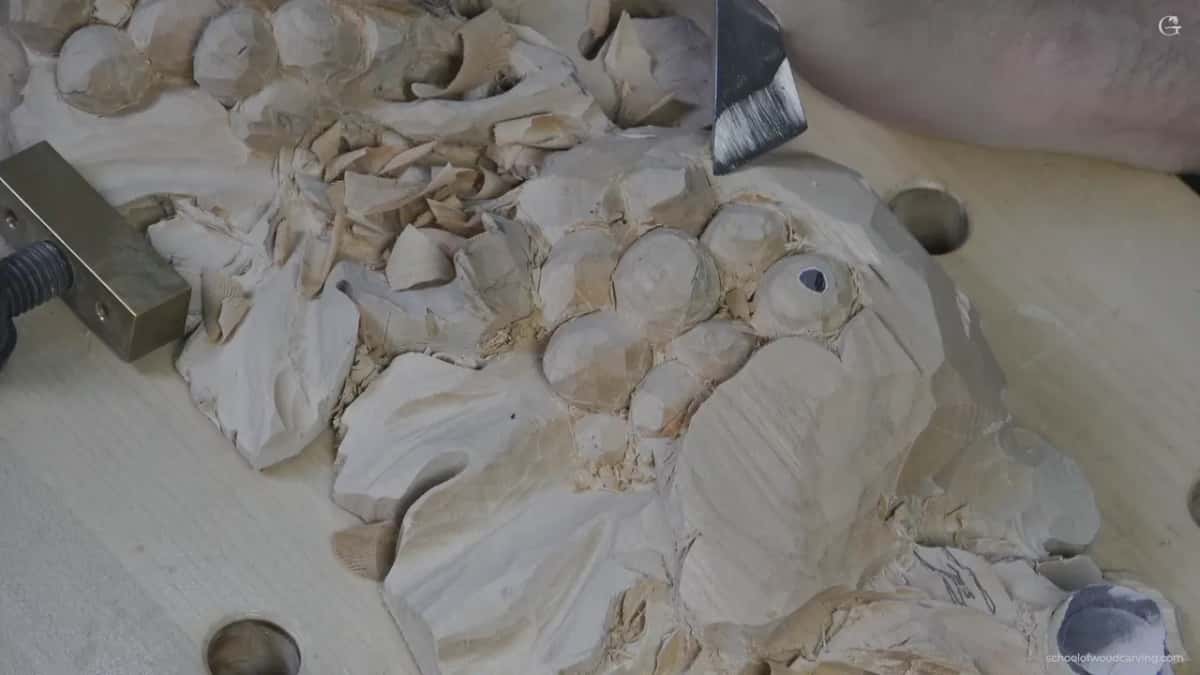
So you redraw, and you change the location based on how you feel at that moment and how the bunch is supposed to look. Where a grape lands depends on the bunch itself. Look at its overall movement, the spread, and that means you prolong those grapes slightly. At one spot I had another triangle right there, but I changed the direction, and I had another grape.
Where do the grapes go once the lines are gone?
The places where they meet tell you. Partway through, I could see my triangle, my marriage point. Not my marriage point, I said, the marriage point of those grapes. With that same skew I went a little deeper in the areas where they meet, just to set them early, and then I was ready to place the grapes.

Block out the main points where grapes meet, and you can easily see the position of the next one. I set one spot with the same tool and found the triangle, then another one, and that meant I had to place a grape right there. Near the end I found a spot right here, outlined that grape easily, and went that direction slightly. All I'm doing there is looking for those connecting spots and setting the movement of the bunch from them.
By the way, you could do those spots with just a knife. With the skew I was only showing you a different technique. For placing the grapes I went back to the tool from before, a number 5, about half an inch (about 13 mm) wide, and I really like this one. The school also has a whole course on carving tools, if you want to read about the tools themselves.

What if a spot won't give you a triangle?
You carve the grape anyway, and then you see how it can connect to the ones around it. I say this maybe too much, but it is important. When it's possible, get a triangle where the grapes meet, and try not to get squares. It is not always possible.
Right at the end of this video I had a spot that was kind of not too good. It wasn't giving me the triangle. It's all right, I said. Let me get this grape, and I'll see how I can connect it. Part one stops right there.

How deep should the first passes go?
Keep them shallow and go a little at a time, because the grape next door is right there. When you dig in with the corner of the tool, don't dig too deep. You can always make it deeper later. Go deep right away and you damage the neighboring grape, and that is really hard to fix later.
I said it twice in a row. Don't go really deep in one go, it won't be good. And again, I'm not pushing here. I'm still slicing. I also told you to make the sizes random, some bigger and some smaller, since all one size looks all right, I should say, but not really nice.
Is there a pattern for this grape onlay?
There will be, made after the carving. Back in lesson 1 I said some of you would ask, and yes, I'll provide one. But I don't have the pattern exactly like what we are carving, because I change how it's going to look on the fly. Once we carve it out, I'll take a picture of it and make some line work from it.
By lesson 3, multiple people had emailed me asking, what about the pattern? I had uploaded another version without some of the movements, and I was waiting until everything was established. The pattern itself comes from a picture of the carved form. Another plan from lesson 1, probably, was a partial picture of it that you can print and start the test with. I'm pretty sure there are different approaches to grapes, but as far as my approach goes, for me it works every time.
Do you need pencil lines on the wood at all?
You really don't have to put pencil marks on, I said in lesson 9. I put mine there for the purpose of the lesson. With fewer marks you do much cleaner work. Lesson 10 had it too. I usually don't want a pencil on the carving, because it's kind of hard to clean, and I was using it for the sake of the demonstration.

I still keep one handy. My pencil stayed close by in lesson 4, since I saw some chances to refine the details. In lesson 6 I drew some movements on the wood, which is optional, but I wanted that one close to life, because in real life you do see movements like that, maybe a little different. Later in that same video I had no idea yet where one movement would go, so I drew it in just to get some logic of it.
Do I redraw on other carvings too?
I do, and I've said so on camera in several courses. On a Roman acanthus volute in lesson 1 of that course I took a little time to figure out my lines and movements, and I told you I was just eyeballing everything. I wasn't that accurate. Most of that material was going to be gone anyway, and I would have to redraw and work out my movements again. In that same video I suggested you try to draw it yourself, divided into 10 parts. Even if yours doesn't look exactly the same as mine, that's absolutely no problem. Repeating my design line for line was not the goal, and a close enough drawing with the main idea would be sufficient. It's a really good practice, I said.
On my furniture panel I had a separation and couldn't remember how it was supposed to go. I could just redraw it, I said, no big deal, even if the design changes a little.
| Carving | Lines | Course | Said |
|---|---|---|---|
| This grape bunch | Drawn grapes went with the lowered bunch | This video | Redraw, and a new spot works |
| Roman acanthus volute | I eyeballed them, that wood would go | Roman course | Redraw and refigure all my movements |
| Furniture panel bouquet | Forgot how one separation should go there | Panel course | No big deal, I can redraw |
| Olive wood box | The printer left off my end points | Lily box | Recreate them, it is no problem |
| Venice Room panel | A number two kept that line placed | Venice Room | Why not, if it is easier |
With the lily box I hadn't thought about the boundaries of my printer, so I had to recreate my end points. I can always redraw stuff, with no problem. And on the Cabernet tray, even if I drew wider, I could make it narrow later. By lesson 8 of the tray, the overall shape, done by hand, wasn't perfect. In a perfect world, I told you, you would make it true first and then carve, and even this would be fine.
In lesson 131 of the Venice Room a bigger tool took me a couple of seconds, and then I could redraw everything and redesign if I needed to. Going in early with a small number 11 under a long leaf, even before I was done there, made the line drawing easier for me to establish. Not long after, I said it again, let me redraw, redesign, and I'll catch you after that. Partway through the second layer of the lily box, lesson 5, I wasn't sure why I had removed a whole part, and it didn't make too much sense. I needed a better picture. So I took a look and redrew the overall movement, with one shape going downhill.
On the hazelnut panel, lesson 2, step number one was probably to redraw some of the lines on the glued blocks, with the same carbon paper as before. Some of you wonder why I still use it. It's kind of really old, but it works. I looked for one point on the drawing and its match on the block, and lined them up approximately.
When is the drawn line worth keeping?
When keeping it is easy. In the Venice Room, lesson 149, I took a number two straight down along a line I had just placed, so I wouldn't lose its position. Not a big deal either way, I said, I can always redraw. But still, why not do it that way if it's easier?
A few lines carry the flow. Lesson 9 of this course has a leaf I changed from the original design, so the pattern you have is a little different. On that leaf one movement goes one way and another goes the other way, and I wanted to just create the flow. Whatever I design, I try to just follow the flow. It's important for me, I said, and it doesn't have to be important for you.
A client's room is another story. My Venice Room lesson 2 page walks through the lines I refuse to lose on a commission like that. On a bunch of grapes in relief, they can move.

The other two parts of lesson 2 keep going on this same bunch, and I'm still not finished with it after them. All three videos are inside the school with the rest of the wood carving course, and the access page has the tuition.
How it's done
- Shape the bunch first. Before any single grape, I look at the shape of the whole bunch in three dimensions and look at it from more than one side.
- Lower all but the high spot. One grape stays high. Everything else comes down under a skew roughly an inch (25 mm) wide, slicing, and I let the drawn grapes go.
- Open the meeting spots. With that same skew I go a little deeper where grapes will meet, looking for a triangle wherever I can get one.
- Redraw the grapes. I draw them again where they look right to me, in the old spot or a new one, and I follow the spread of the bunch.
- Place each grape with a number 5. My half inch (13 mm) number 5 goes in at the corner, shallow at first, so I don't damage the grape next to it.
- Connect the awkward spots after. Where a junction gives me no triangle, I go ahead with that grape and then see how to connect it.
Frequently asked questions
Can I carve a grape in a different spot from my drawing?
You can, and that is what I told you on this bunch. Once the bunch came down, the grapes on my drawing were gone, and I redraw each one wherever the shape looks right to me then. My own pattern for the onlay comes later, made from a photo of the carved piece.
Which tool lowers the whole bunch fast?
I like a skew for it, about an inch (about 25 mm) wide, I would say, because it blocks the shape in fast. Bigger tools are always better here, like a number 2. A regular gouge does the job as well, so the skew is my preference and not a must.
Should every grape be drawn in pencil before I start?
Only as much as helps. Pencil marks are optional, as I said in lesson 9, and with fewer of them the work comes out much cleaner. Lesson 10 adds that pencil is kind of hard to clean, so mine is mostly there for the demonstration.
What to carve next