

Alexander Grabovetskiy, woodcarver, School of Woodcarving · Published 2024
What does airborne mean in wood carving?
Quick answer: Airborne is my word for a carved part undercut all the way through, so light gets in under it and it floats. My grape onlay had one weak spot that I took through from both sides with a number 11, first 2.5 mm, then 2 mm (about 3/32 and 5/64 in). Other spots kept their connection on purpose.
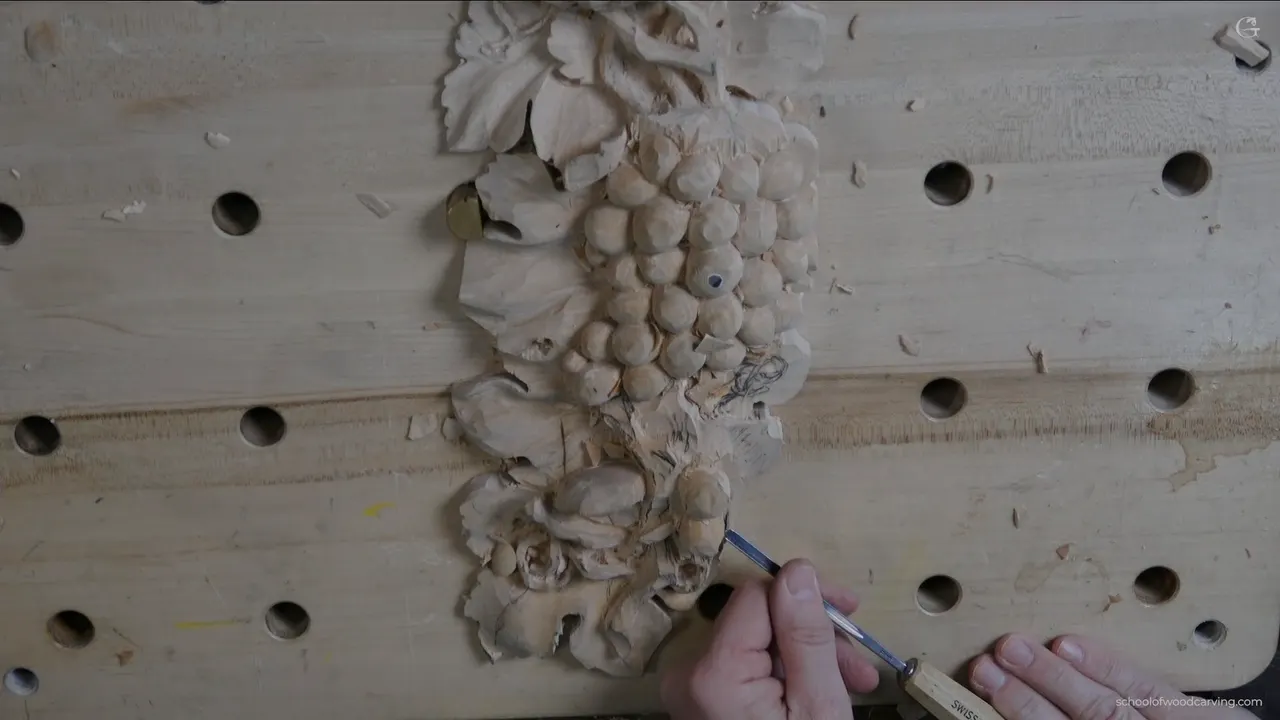
Airborne is what I call a carved part freed underneath, the whole way through, so light gets in behind it and it floats over the wood below. In undercutting wood carving you can stop short of that, and an undercut that stops short already throws a shadow. Airborne goes the last little bit. I said it while I worked on this onlay, floating, airborne, like it's scrolled.
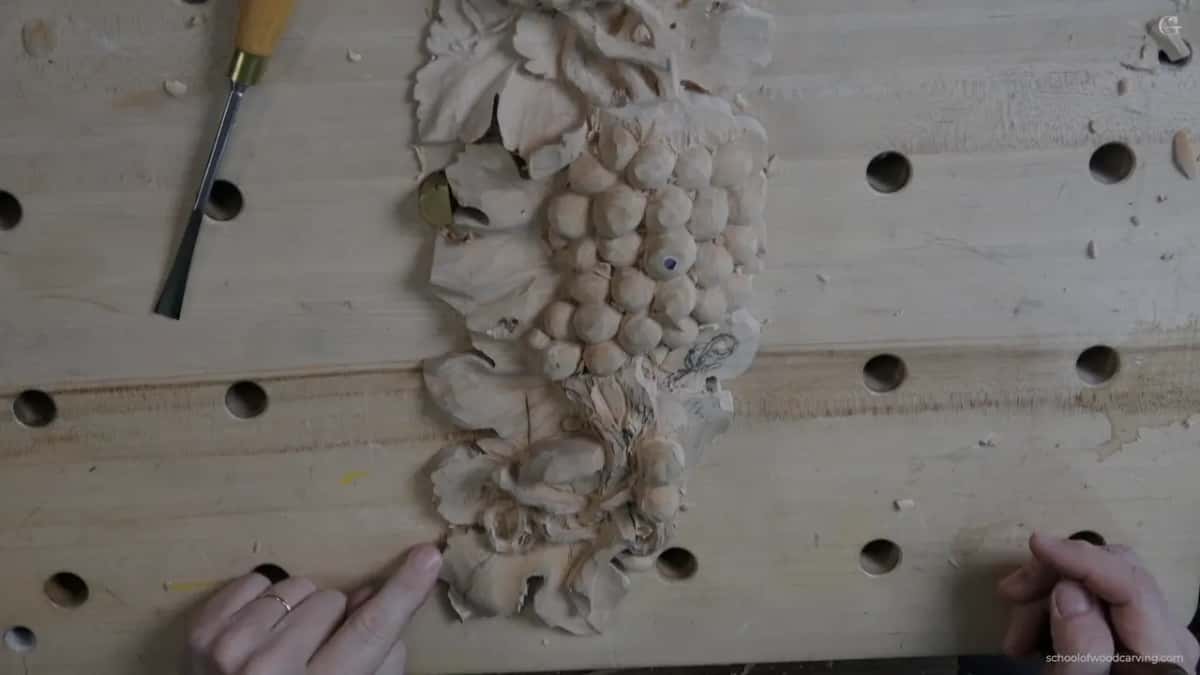
This is the third video of lesson 5 of my grape onlay, a relief carved on its own board. It opens on a junction of vines with lots of movement, and it ends on that same junction, which I think looks good.
Have you seen a carved leaf with a thin line of daylight under its edge? Did it look like it could lift off the board? Then you already know the effect. Below are the spot I took through in this video, the spots I left connected, and what I said about the same choice on seven other pieces.

Airborne on this panel, line by line
- Airborne means through, with light under the part, and a shadow under an edge is not the same thing.
- A weak spot here went through anyway, one side and then the other.
- In another spot I said there was no reason to go through, and I didn't need to.
- Grain decides a lot. One section with short grain kept its connection.
- Pieces that people touch, pack or bump are safer left connected.
- Once a part is free, it keeps getting thinner, slowly, and I watch it move.
What does airborne mean in wood carving?
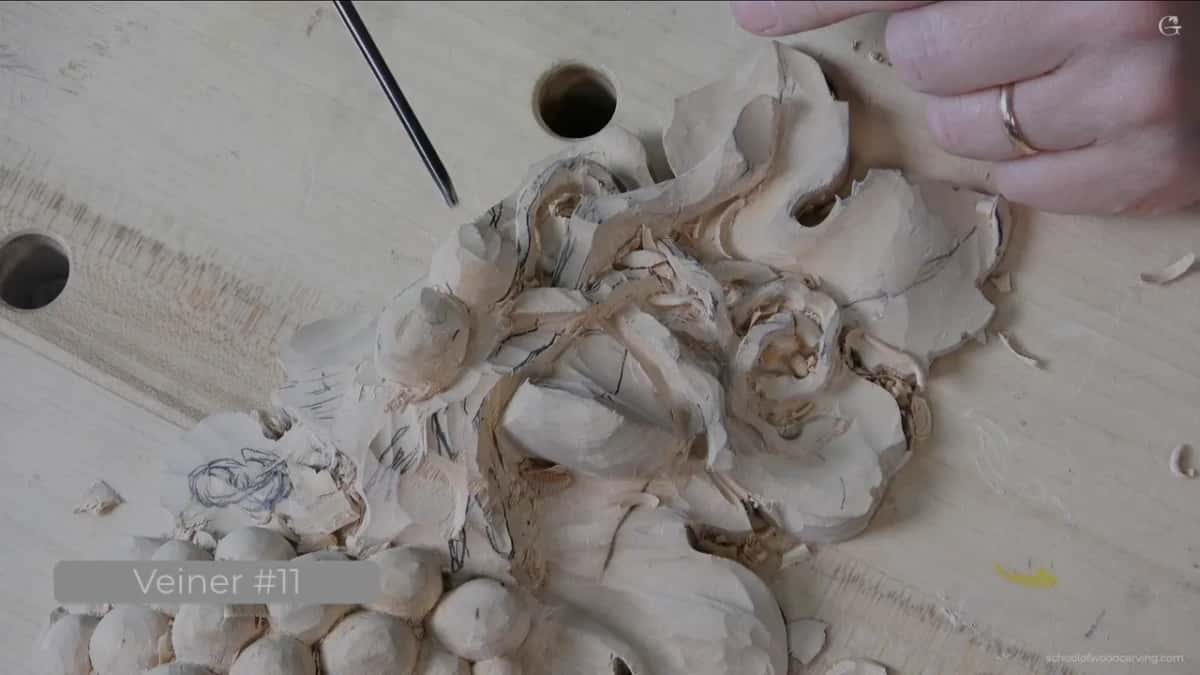
A part you can see light through. Once I was through at the weak spot in this video, I stopped there. That's enough, I said, twice. See that shadow? It's casting there, there's a light. That is what I'm after, a slight painting with the light, just outlined.
The Tray of Blessing, lesson 5, got fewer words. Take a look, I said, I'm all the way through. See that hint of light? So that is absolutely airborne.
Two lessons later on that same Cabernet Sauvignon tray I said what it buys you. Make the airborne effect, and the light is going to travel underneath, and the part will just kind of pop. That was Tray of Blessing lesson 7.
Part two of this lesson put it in terms of light too. I asked if you could see the light go right inside. That play of light and shadow, I said, is what wood carving is all about. You can't fake it with color. I mean, you could, but light and a shadow are easier.
Being airborne is not the same as being high. Part one of this lesson has a vine I freed where it crosses the leaf. Now it is completely airborne, I said, even if you don't see it. It sat only slightly raised. But it cast enough shadow, and you could see it was actually good.

How did I take a weak spot airborne on the grape onlay?
Slowly, and from two sides. The spot sits inside a busy junction. At the start of the video I rearranged it, so the main leaf goes up and the other part goes down underneath it, hidden right under that motion. That gave me a really good shadow spot, and it made much more sense.

Before any undercut I needed room, so a number 11 of 4 mm (a bit over 5/32 in) made a downhill pass of about a quarter inch, maybe three sixteenths, five to six millimeters, as I said it. I had to expose the side, or there would not be enough material. Then exactly the same on the other side.
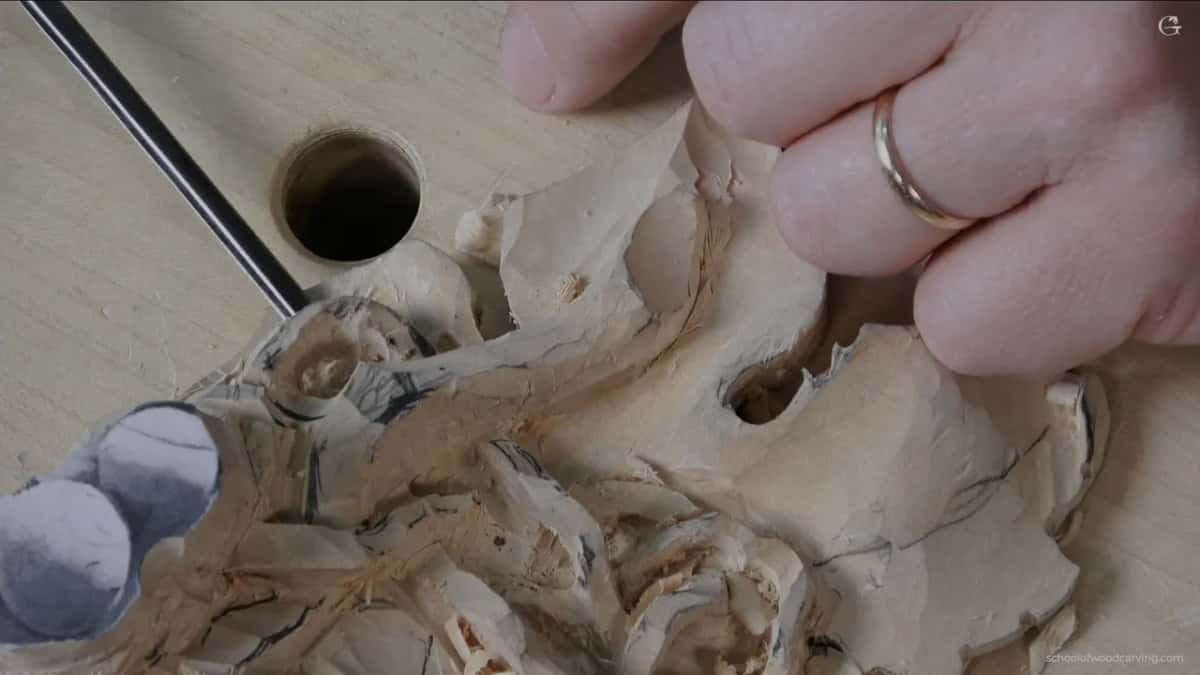
For the undercut I stayed with the number 11 but took a smaller one, 2.5 mm (close to 3/32 in), with the flute turned to my right, to about two o'clock. And right there I said the part was somewhat weak. Still strong enough. But the grain was already twisting a little toward the left, which leaves a short grain.

So you've got to be careful. But I like that, I said, and I still think it is going to give me a really good look. I told you right then that I would go through from each side.
Please don't rush it. I picked up an even smaller number 11, 2 mm (about 5/64 in), and went little by little. Partway through I said I could actually leave it like that, without making it airborne, though I wasn't sure you could see on camera how far through it already was. Like I said, that is a weak spot. Have to be mindful of that.
Then it was through, and that was where I stopped. Part one went the same way with the vine over the leaf. My 11s went two and a half, then two, then one millimeter there (about 1/10 in down to 1/25 in), one side, then the other side. Probably the most important part of that operation, I said, is not to rush it.

Does every undercut have to go through?
Only where I want the light. Later in this video I had to dig underneath one main line, otherwise you wouldn't see that crazy junction the way you intended it. But I said I didn't have to go through there. You could, but there's no reason. Maybe I will, I don't know.
Close by was a part I had to be careful not to push on. Strong, but still kind of a dangerous area. I had plenty of shadow and light already, so there was no need to overdo it.

Leaving a little wood on purpose has its own name in my lessons, the connection point. Call it the counterpart of airborne. Part two kept one where I could have gone through. You don't want completely airborne in this case, I said, and you could, but there's no reason for me to do it.
After hooking out the mess on the Chamomile and Bow Rosette with a half millimeter (about 1/50 in) tool, I said you could go extreme and take it completely airborne, which is absolutely fine. A moment later I said probably not, because of the way it will be used and installed. I didn't want to risk it.
When can a part not be airborne?
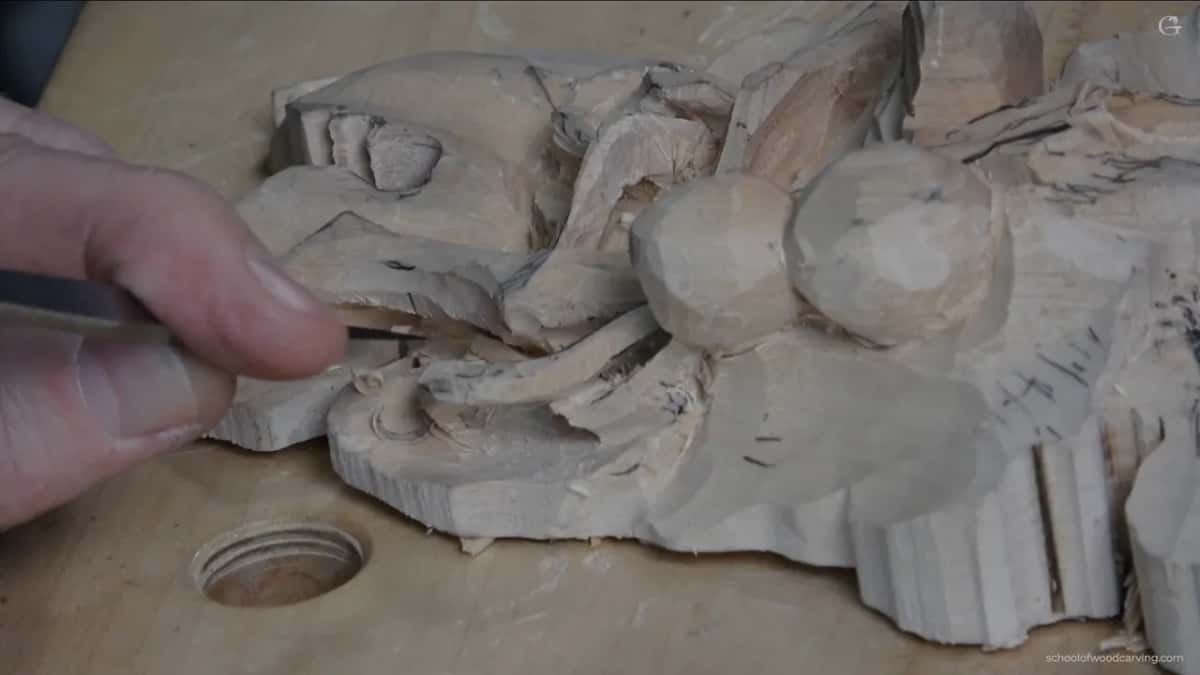
Short grain is the first reason I gave, and this video has a clear case of it. Near the end of this video one raised section was weak, and I still needed its connection point. So I excavated from above and went downhill until it was pretty close to 1/16 inch (just over 1.5 mm) on that side. It's a short grain, I said. It cannot be airborne. I mean, it could be, but no reason.
Earlier, in part two, it went the other way. I could take one part through there because the grain direction was stable. Not as weak, so it was possible, and a moment later I was already through.
On the tray I said the same in lesson 7. If you want to do the airborne part, look at the grain. That is going to be the strong part. Another section would break, I said, because of the short grain. And every time you design something for airborne, make sure you do it with the long grain.
In the Carving Modern Acanthus course, lesson 7, I said to undercut before the piece came off the board, with a number 11, 3 millimeters, 1/8 of an inch, the tool turned to three o'clock and then to nine o'clock on the other side. Keep the connection, please. Sometimes it is good to have airborne. But in that case, I said, the grain ran in a direction that makes the piece so fragile you break it right on the grain.
Where does an airborne part not belong?
Anywhere hands or bags will get at it. In that same acanthus class I asked people not to go through at all. As much as I love airborne, you have to travel home and pack that thing, and you're going to break it. Or the people who check your bags will. Ask me how I know.
Furniture is the other place. My furniture panel in lesson 31 could have had some kind of airborne movement, I said, a pass right underneath so you can see through it, but it would not be practical. Furniture carving and ornamental carving differ hugely right there. A part like that sits low. People will hit it.
My Grinling Gibbons class in Maine, class 14, shows the opposite case. A spot there was going to be really weak, and I went through anyway, because I was not planning to use it as a piece of furniture. That piece is going on the wall. Don't do it, I said, if you don't feel comfortable.
Airborne or connected, spot by spot
| Spot | Choice | Reason |
|---|---|---|
| Onlay weak spot | took it through from both sides, slowly | I liked the look |
| Vine main line | dug under, said no reason to free | plenty of shadow already |
| Short grain section | kept a connection point, excavated from above | weak, raised, short grain |
| Stable leaf part | went through, since the grain there held | not as weak there |
| Modern acanthus class | asked everyone to keep the connection, please | pieces travel home packed |
| Chamomile rosette part | called airborne fine, then probably held back | how it gets installed |
| Walnut furniture panel | could have freed it, kept it low | people would hit it |

How much wood do you need before you go through?
Enough. I keep an eye on how deep I am going. Maybe I'll go through and make it airborne, I said in part one. Why not, if I have enough material? If I don't, then that's a problem. At the point of the eye I still had about 1/8 inch (3.2 mm) there, so I should be safe.
On the tray in lesson 7 that meant dropping even deeper first, about an eighth of an inch, about three millimeters, and digging out from either side. Keep the passes going, I said, or you can catch the grain, split it and create a problem.

My hazelnut relief, lesson 3, had me fixing a mistake and making one part even more airborne. About a quarter inch, actually more, three eighths, about 10 millimeters inside already. I wasn't forcing anything. Slicing, always slicing. And I kept some thickness on purpose, because more details were coming.
The grape leaf vase, lesson 3, got it in one section. I thought, why don't I make it airborne? A number 3 of 1/8 inch, three millimeters, went in from one side, then the same idea from the opposite side, and a number 11 took the waste. A little detail, not a necessary one, but I think it looks really nice. And you can do it everywhere else, I said.
What happens to a thin part after it goes through?
More thinning, very slowly. Back on the grape onlay, once I started refining, every pass had to be careful, especially in the weak spots, where the grain is really short. Really tiny passes, until each tendril is about a sixteenth of an inch (roughly 1.6 mm) when you look straight at it. It can stay a little thicker at the bottom. More stable, and up to you.

I took a number 2 of 5 mm (about 3/16 in) to shape the sides a little better. See how weak that is, I said. And see how it moves. Be careful. From the side it was not even close to a sixteenth, and it didn't need to be.
Not every piece goes that thin. Earlier on, I said one piece is not even a tendril. It is like the vine itself, so I let it stay wider, about three sixteenths of an inch (close to 5 mm), and hid it under a grape. It curls up, so I was really careful there. Just before that I had said I still keep it somewhat thick, and I can always make it thinner a little bit.
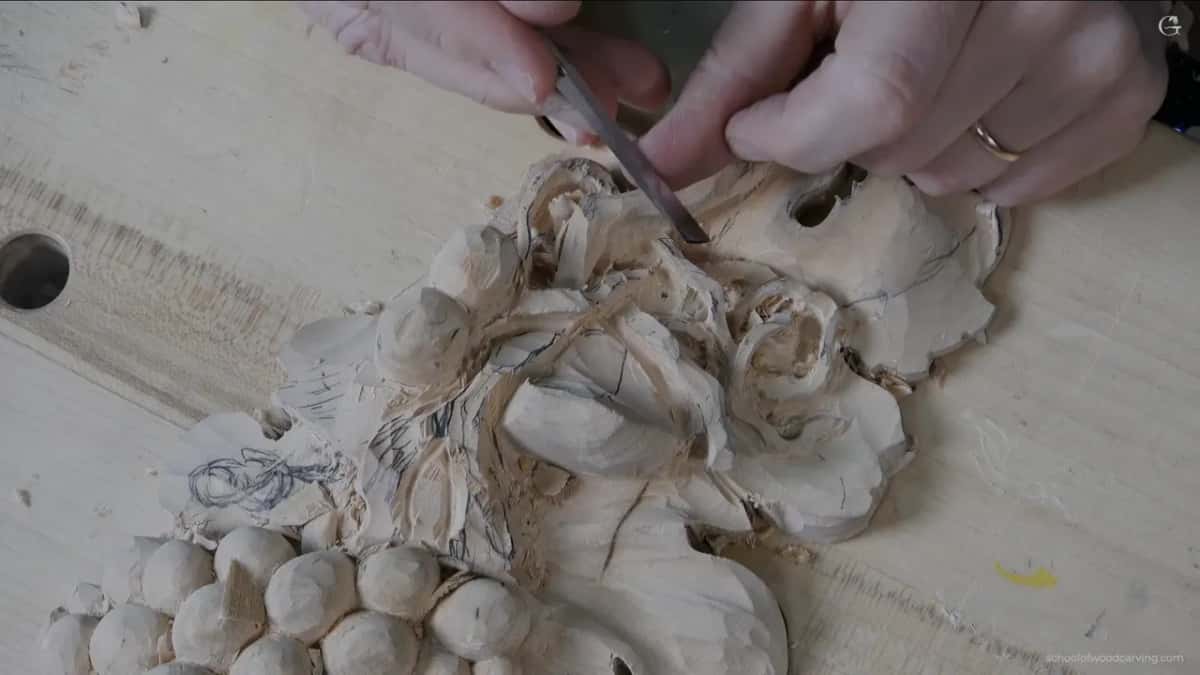
Then I found a crack on the side. It was still strong, cracking inside, not broken, and I am going to put some kind of glue in it. Maybe I wasn't careful somewhere. The rest of the thinning happens off camera, under my magnifier glass, thinner and thinner, attacking from different angles. But the junction itself, I think, looks good.

Should you try airborne on your own carving?
If you go slowly, yes. Nobody has to take on a junction like mine, and I said so on camera. Some of you may not even like how it looks halfway. Got a sharp gouge and a stem in basswood with the long grain running along it? Can you dig under it from one side? And then from the other? Then stop when you see light, and look at it from above.
The whole board, every grape and every openwork tendril, is in the Carving Grape Onlay course. Access opens every lesson of it. Next comes lesson 6, where the vine gets freed from the same board.
How it's done
- Make room beside the part. A downhill pass with a 4 mm (5/32 in) number 11, roughly a quarter inch (about 6 mm) deep, exposes the side so there is material to undercut.
- Read the grain. Where the grain twists and runs short, I slow down. Where it runs long and stable, going through is possible.
- Start underneath. My smaller eleven, flute at about two o'clock, starts the undercut under the part.
- Finish from the other side. An even smaller eleven goes in little by little, working each side in turn, until light shows through. I stop there.
- Keep connections where it is weak. With short grain, the connection point stays, and I excavate from above, going downhill, instead of freeing it.
- Thin it last. Tiny passes bring the tendrils down to 1/16 inch (1.59 mm) seen from above, with a bit more wood left low on each one, and the magnifier comes out for the final cleanup.
Frequently asked questions
Is airborne the same as undercutting?
Undercutting is the digging, and airborne is where it ends if you go right through. One undercut on this onlay stopped short and already cast shadow on both sides. I said you could leave it like that. Another one went through until light showed underneath.
Which tools free a carved part from the wood behind it?
Small number 11s did it on this onlay. Two and a half millimeters (just under 1/10 in) started the weak spot, and two finished it from each side. In the first video the smallest was 1 mm (about 1/25 in), and where an eleven could not fit, a 5 mm (3/16 in or so) number 2 went in upside down.
Why would a carver keep a part attached instead?
Grain and use. A short grain section on my onlay kept its connection point, and on the acanthus class I asked for the connection to stay, because the pieces were going home in bags. On furniture I don't make much airborne at all, since people will hit it.
What to carve next