

Alexander Grabovetskiy, woodcarver, School of Woodcarving · Published 2025
What is a knife edge in wood carving?
Quick answer: A knife edge in wood carving is a rim carved so thin it reads as a blade, with thick wood left behind it. On my grape onlay, working on the reverse side, I left maybe one sixty-fourth of an inch (about 0.4 mm) at the edge and about a quarter inch (6 mm or so) under the face.
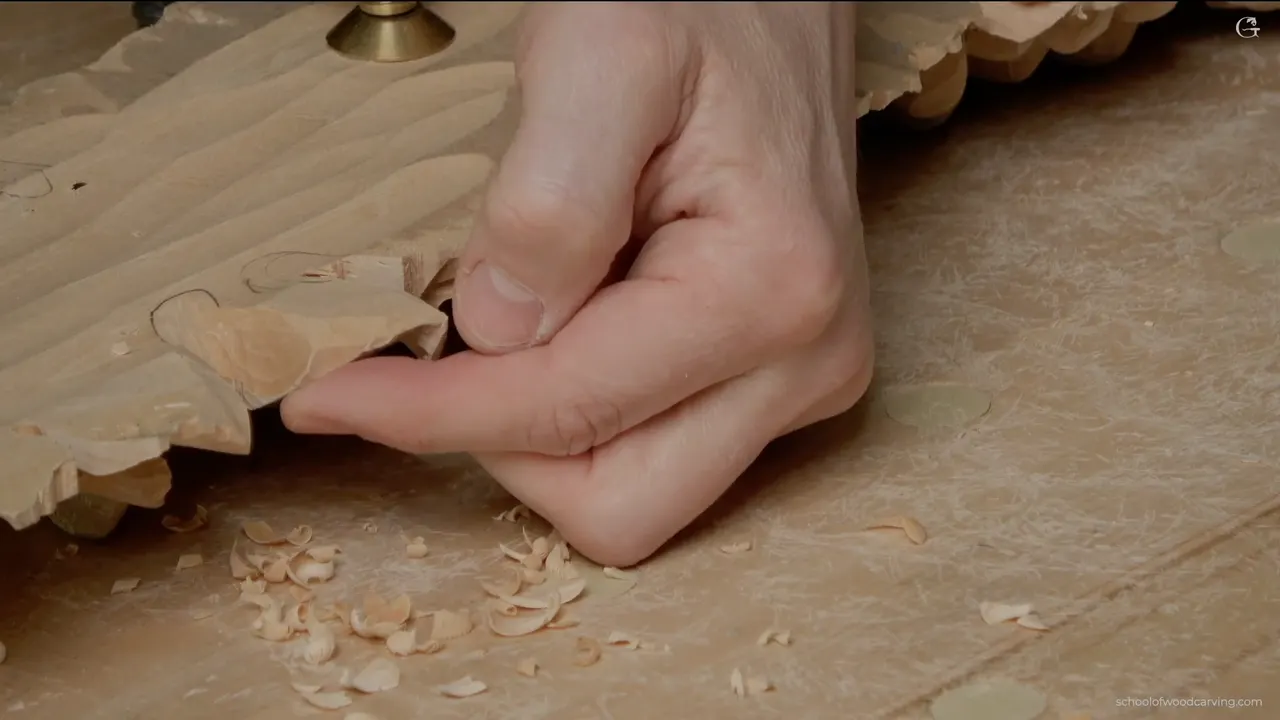
A carved knife edge is the rim of a shape taken so thin it looks like a blade, while the wood behind it keeps real thickness. It is a thin edge carved in the wood, not a sharpened blade. This part of lesson 12 is undercutting wood carving on the back of my grape onlay, and the channels I dug there ran out to a knife edge. At one spot I left maybe a 64th of an inch (roughly 0.4 millimeters).
Want a carved leaf to look paper thin? Would you like it to stay in one piece, too? Then keep the thin part at the very rim and the thickness behind it.
That paper look is mostly for the eye, and on the Tray of Blessing I called it an illusion. Here are the numbers from the onlay, the gouges that reach the edge, what nearly went wrong, and the same edge carved into a tray, a Venetian panel, a rosette and a Grinling Gibbons class in Maine.

Where the knife edge sat on this grape onlay
- At the rim, a knife edge.
- Under the face, around a quarter inch (5 to 6 mm).
- A number 11 dug the channels, and a number 7 followed to take a little more from inside.
- Each one ran outward.
- Slicing, even with a tool that deep, because I don't want a choppy back.
- Face and back watched as it thinned.
Is a carved knife edge sharp?
A carved one is only thin, and the name comes from the way it looks. A blade is ground and honed so it will cut. This one only has to look sharp.
I said it plainly on the onlay, right in the middle of the work. I am going all the way to the knife edge. There's my face side, and that is my back. The edge is the line where those two meet, the face carved earlier and the back I was digging into right then.

The tools that make it are another story. Be careful with the grain direction, I said in this part, and the sharper the tools, the better the result.
How thin is a knife edge on a wood carving?
Maybe a sixty-fourth of an inch. Yeah, that is a real knife edge right there, I said at the rim of my onlay. I left maybe about one 64th of an inch (close to 0.4 mm).
The wood just behind it is a different figure. If you leave approximately a quarter inch, about six millimeters or five millimeters, you should be okay. That came right after I checked the thickness on the back.

The part before this one put the leaves through the same check. The rim was a knife edge while the overall thickness behind it was still about a quarter of an inch (about 6 mm). I could leave maybe five millimeters (about 0.2 in), and in one section it was probably just about one sixteenth of an inch (about 1.6 mm).
Too thin is not what I want. I've done that mistake multiple times, where the tool pretty much goes right through. How far a leaf on a pierced panel can be thinned is the subject of lesson 7 of my Hashemi flowers course.
How do I carve toward the knife edge from the back?
With a number 11 veiner and channels that run from the inside outward. I called the number 11 my favorite tool in this video, and the size depends on whatever the project is. Here I said about six, maybe seven millimeters (roughly a quarter inch), and picked up the seven.

A veiner is a deep, U-shaped gouge. I excavate the channel and watch this side, whatever is left before that knife edge. I come at it from the inside outward. Even with the number 11 I'm still slicing.

Keep an eye on both sides, it's really important, by the way. Once in a while I also check the thickness, and that time it looked like I had plenty of material right there. There was another hole on the other side, and I could do exactly the same there.

Lesson 6 of the tray course had the same direction for an undercut. From the center toward the outward, I said, and not from the outside inward the way we worked before. The tool there was a number 9 of 20 millimeters (about 0.8 in), and it was the same tool we used on day one.

Why does undercutting wood carving end at the edge?
A thin rim is what makes a thick piece look thin. The goal on the onlay was to take it right through to the edge, and step number one was to excavate the areas where you see the eyes, the small open spots in the design. Step number two was a little bit underneath the lifts.

With the tray I put numbers on it. I stay about 10 millimeters (about 3/8 in) or so, then carve up to the knife edge. That way it looks really thin, but it's only visual. The 10 could be as much as half an inch (about 13 mm), I added, and that was no big deal.
About a minute later I said take a look. Because we got into the knife edge, it looks like paper thin, but it's not. In plain words that is an optical illusion, made with a gouge. Lesson 11 of the Venice Room chases the same look on an acanthus lobe without leaving it weak.
Does a knife edge make a carving fragile?
That tray edge was really looking that way, really fragile, but it's not, I said. Don't stay too deep inside, because it's going to be too fragile, and you can break it.
Constantly check and recheck what is going on, I said on that tray. My own edge got the same look. Maybe a little too low. But it's okay, it should be okay, and maybe I should keep that a little higher, but that's fine.

How far to go depends on the job, too. If I were carving a piece of decoration for the wall, I would do an extreme undercut, but not on the tray, a practical use thing.
I kept a handle on that same tray. You keep that meat at about 10 millimeters, or three eighths of an inch, so you can grab it with the hand. It's going to look like a knife edge, but still have a thickness. Just make sure you check how much thickness you got, I said a few minutes later, and don't be too excited when you carve like this.
The course carries the name of the Cabernet Sauvignon grape.

What stays thick while the rim goes thin?
Whatever the piece hangs on. My Maine class 6 kept the center untouchable, because that was the glue spot for the board at the back, and it would be plenty for the glue, and solid.

Around it we went to the edge point. Keep an eye, just don't overdo it, I said. Walls had to go as well, I wanted none of them, so remove those walls, with the smaller tool if you need to. Get everything to the knife edge. That was step number one.
Those holes needed a lot of material removed, to expose the stems right underneath. They were another matter. Not to the edge point, don't overdo it, those stems have got to be around a quarter inch (6 mm or so). That quarter inch sat beneath the carved face of the onlay, and only the rim went down to the sixty-fourth.
When do you take a carving to the knife edge?
Late on the Venetian panel and the tray, early on the onlay. A Venice Room panel in workshop 156 got only a preliminary undercut at first, just for establishing the form. I'm going to take it to the knife edge later on, I said, but I'll do it from the backside.
The number 2 I used was 10 millimeters or so (0.39 in), and it took the edge just to the knife edge for the moment. The clean-up would come a little later, from behind. I needed a smaller one after that. I don't want to take it too much from this point, I said.

In lesson 5 of the tray course I first left approximately five or six millimeters, three sixteenths or a quarter of an inch thick, and said later on I'll take it to the knife edge.
Just before that, on the same tray, I took a number 11 of three millimeters (about 1/8 in), placed it with the flute out at about nine thirty, maybe 9:25, and started undercutting. You have to feel the grain direction, and if it fights you, flip the piece and attack from the other side. You really have to undercut before you go deeper, because until then you can't see how deep it's supposed to be.
The onlay didn't wait for its notches. A leaf without them can still get its knife edge, since the subdivisions can be carved at any point later.

Edges I carved thin, and the wood kept behind them
| Piece | Edge | Behind |
|---|---|---|
| Grape onlay, back | Seven millimeter number 11, from inside outward | A quarter inch, 6mm |
| Grape onlay, leaves | Knife edge carved before any notches existed | Five mm, 0.2 in |
| Tray of Blessing | Number 9 worked from center toward outward | Ten mm, 3/8 in |
| Tray, lesson five | Left thick, knife edge saved for later | 5-6 mm, 3/16-1/4 in |
| Venice Room 156 | First undercut only roughs out the form | No figure given there |
| Gibbons, Maine class | Everything to the knife edge, no walls | Quarter-inch stems, 6 mm |
| Venetian Flowers Rosette | Thin super glue soaked into the edge | Paint grade piece only |
Which gouges finish a knife edge?
Whatever reaches the spot, and in two of these lessons the tool went in upside down. For an opening inside a flower in Maine class 7, I cleaned it with a 10 millimeter number 9 (close to 0.4 in), my tool upside down, and took the pass out to the edge.
That way I'm undercutting and creating a really sharp, knife-thin rim on that part of the flower. You don't push it, you slice it, and you can attack it from all the sides.

For the grape leaves in lesson 9 of this course it was the small, tiny number 3, upside down again, going to the edge to make it like a knife edge. After it came a number 11 of half a millimeter (about 1/50 in), to hook out whatever mess the number 3 had left.

Back on the onlay, the number 11 did the channels, and a number 7 went in after it to excavate a little bit inside, with the same eye on both sides. The tray got a smaller number 9, starting about three eighths of an inch (10 mm) from the edge, creating that knife edge look.
What can go wrong on the way to the edge?
A wave inside is the first thing. I had some kind of wave on the inside of the onlay, and I could mess it up if I kept digging too much.

A danger zone is the second. One spot needed an approach from the opposite side, maybe a clean-up the other way, or even a different tool in the end, like a spoon gouge. On another side I said it would probably be better to come at it with the right direction.

Then there is the choppy back. I was trying to slice, because I don't want to see a choppy back. It could look rough, and I'm okay with that, but I would still like to see clean work in there.
Can a knife edge be saved if it is too fragile?
For a painted piece I used glue that soaks in. My Venetian Flowers Rosette, a carved rosette, had a really fragile edge, as thin as a knife edge, and those parts were really paper thin. Because it was paint grade, I stabilized it with something like a super glue, but a really thin, liquid one.

All you do is let it penetrate. It goes right inside and through the whole edge, and that stabilizes it. I wouldn't do that if the piece weren't going to be painted.
What lesson 12 shows of the edge
In lesson 12 the back of the onlay, a relief carved on its own board, is an approach, not the finished product. I could just go on and on with this project, and it's kind of fun, because there's no end to it. If you look behind me in this video, there is a big project I was working on at the time and not filming, and it takes a lot of my time. The same carving runs through lesson 11 and lesson 13, and the whole set of videos sits behind Access.
How it's done
- Pick a deep tool. I take a number 11 veiner. About six, maybe seven millimeters (close to a quarter inch) was my figure here, and I went with the seven.
- Dig outward from inside. Each channel starts inside and runs toward the rim, and I keep slicing even with the number 11.
- Watch the face and the back. Both sides get my eye. Once in a while I check the thickness.
- Keep the body thick. Approximately a quarter inch stays behind the face, which is five or six millimeters.
- Thin only the rim. At the very edge I go down to maybe 1/64 inch (under half a millimeter).
- Follow with a number 7. After the channels, a number 7 excavates a little bit inside, and I still watch both sides.
Frequently asked questions
Does the knife edge itself get sharpened?
Only the gouge that makes it gets sharpened. The edge itself is thin wood at the border of a leaf, and on the onlay the rim went down to a knife edge. Behind it the face kept close to a quarter inch (about 6 mm).
How thick should the wood be behind a knife edge?
Leave a quarter inch, six or five millimeters, and you should be fine, I said on this onlay. My tray kept around 10 millimeters (just under 0.4 in) before I carved up to the edge, and that could have gone to half an inch (about 13 mm). Going too thin, right through the wood, is a mistake I have made more than once.
What gouge carves a knife edge?
My number 11, a veiner of about seven millimeters (just over 1/4 in), did the channels on this onlay, working inside outward and still slicing. After that, a number 7 went in. For a danger zone I might come from the opposite side, or finish with a spoon gouge.
What to carve next