

Alexander Grabovetskiy, woodcarver, School of Woodcarving · Published 2025
Which way should the flute face when you carve under a thin stem?
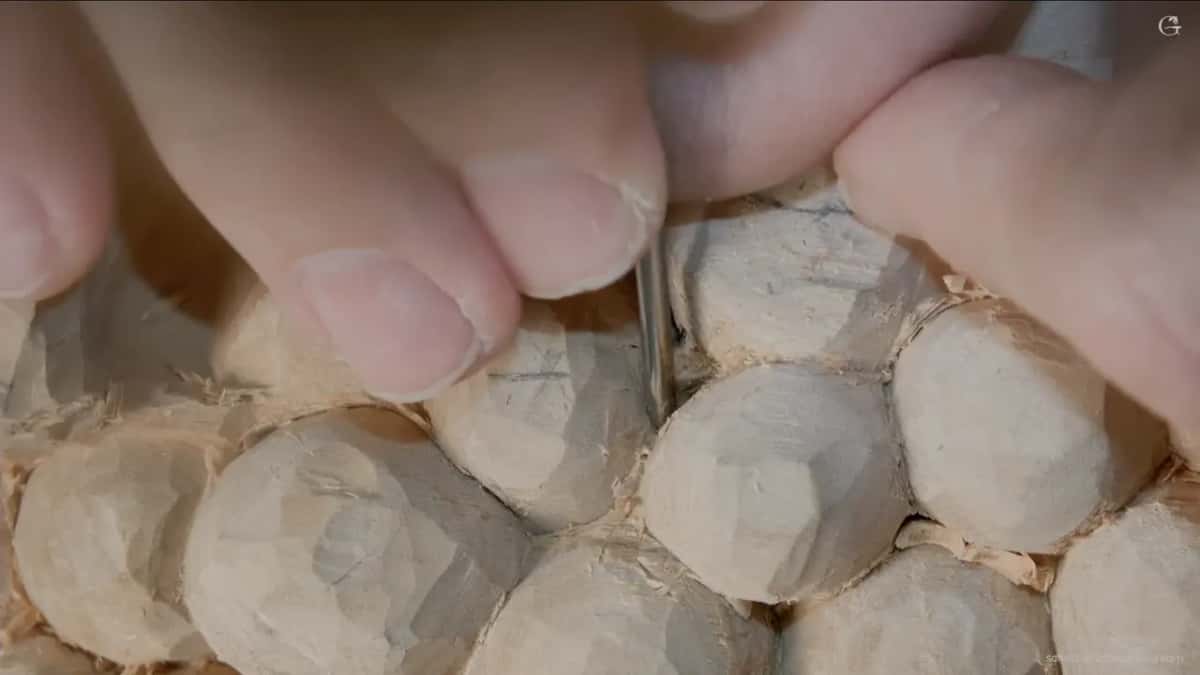
Quick answer: The flute's direction below a thin stem is, on my grape onlay, a clock read from the detail. At six o'clock, tool upside down, my smallest gouges dug underneath. At about three o'clock, three thirty, a number two cleaned the side of a grape, and pointed toward the grape it started the joint.
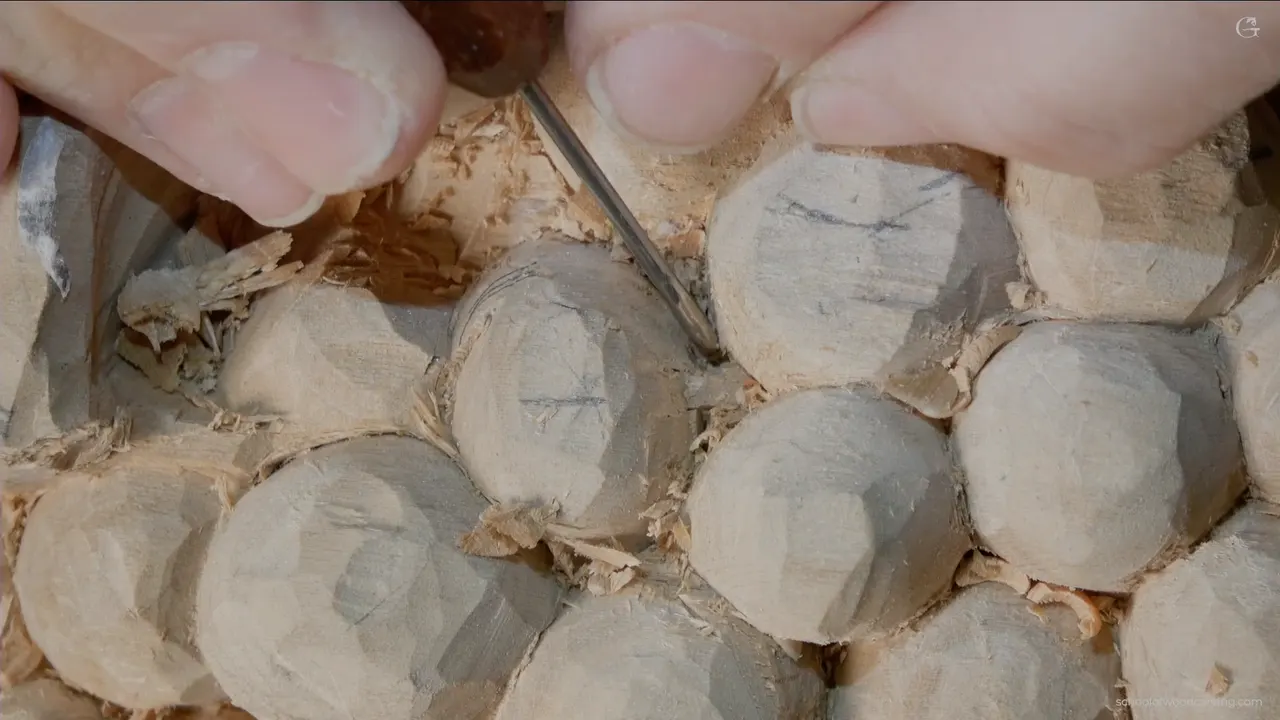
Flute direction under a thin stem is a clock you read from the detail itself. On my grape onlay the gouge went in upside down, flute at six o'clock, to dig under a stem between two grapes. Turned out toward three o'clock, a small number two cleaned along a grape. Pointed at the grape, a number two started the little joint where the stem meets it. If you want to see how to use wood carving gouges in a spot this tight, this part of lesson 13 shows all three, one after another.

Have you had a small part of a carving snap while the edge was under it? Would you like to see which way the flute faced while it was down there? Then start with the clock.
The stem itself was started in the first video of lesson 13. In this second one I free it. Below are the positions in the order I used them, and then the same habit from six other lessons of this course, where the flute went upside down for the same job or for a different one.
Three clock positions for one small gouge
- Turned over to six o'clock, the tool's edge goes in under the stem and lifts the waste out bit by bit.
- Facing out toward three o'clock, it cleans a grape's side.
- Pointed toward the fruit, a 2 mm (about 5/64 in) number two starts the small joint where the stem comes down into the fruit.
- Count the dial off the detail itself.
- Small passes from each side in turn, and no cranking on a stem that thin.
- When upside down stops working, I turn the tool back over and shave.
What does six o'clock mean on a carving gouge?
Six o'clock means the flute faces down, the gouge turned upside down, and the dial is set by the detail you are carving. Think of the hands of a clock face. Twelve is the flute straight up, and six, down at the bottom of the dial, is the flute turned fully over.
For this stem I took two really tiny tools, a number 11 of half a millimeter (roughly 0.02 in) and a small number nine of approximately one millimeter (about 0.04 in). With the flute pointing down to six o'clock I started digging right underneath. Carefully, carefully, carefully. I just wanted to get as deep as I could.

Words for it came on a weak spot in lesson 11. There a number three could catch the grain because of its sweep and do damage, so I left it out. From that side I was slicing, not pushing. I picked a half millimeter number 11 (about 1/50 in) next and flipped it over. The waste came out almost like a hook, then I just picked it. Now I could see the hole. Then I told the camera my flute was down to approximately six o'clock, relative to the detail, of course. After that I flipped my flute and dug a little more from the far side, and I still had my connecting points. Don't pay attention to how it looks yet, I told you then, since it didn't look too appealing with no details in.
On the Cabernet tray I said it a little differently. A curl there needed an undercut, and the number 11 went in with my flute upside down, approximately six o'clock versus the surface. Then a number seven took off the ridges. You could really see the shadow after that, almost like a frame around that piece.


Why turn a gouge upside down to dig under something?
To reach where a normal position can't, and to get the shadow. Back in lesson 5 a 5 mm (about 3/16 in) number two made a cut straight down, then I turned my tool over and started undercutting that way, since there was no way I could fit a number 11 there. I had to use it a little differently. Within a minute that piece was completely airborne, even if you couldn't see it, slightly raised but casting enough shadow.
Shadow is the other half. On lesson 8 I wanted a flatter tool, something like a number six or seven, and took a number five of six millimeters (about 1/4 in) with its flute going under, to exaggerate the undercut. Don't worry about how it looks yet, I said. At that stage you are after the huge big shadow, and it got really beautiful. Then a light clean, since it looked so messy. Part of the neighboring leaf still had to come off too, because that leaf wasn't supposed to go that far. Painters have their own word for that play of dark and light, chiaroscuro.
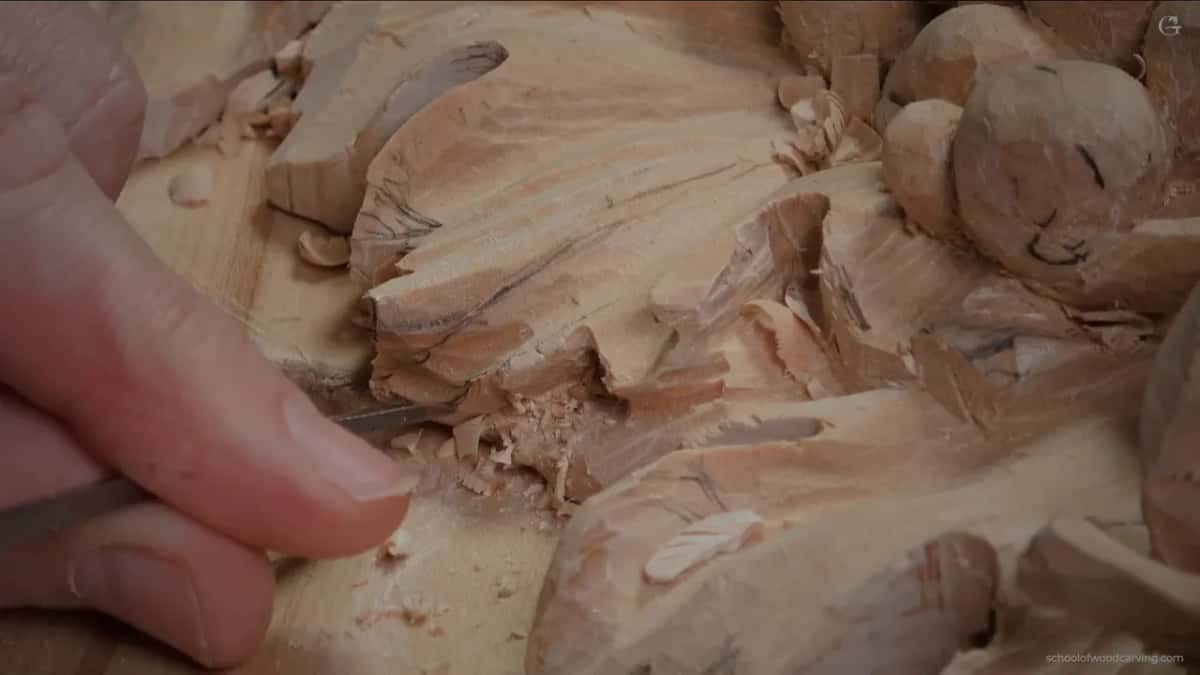
During lesson 14 it was a concave underneath, so a spot could cast a much better shadow. Careful there, and slow. I'm not sure you understood what I meant by it, I said, but I really needed to see that shadow right there. I wasn't pushing, because pushing there would be a big mistake. The gouge was flipped, its flute pointing at six, and then I could see that shadow.
How do you use wood carving gouges under a stem from both sides?
One side and then the other, with smaller tools as the hole gets deeper. At the start of this second video I hoped you'd see a little better now, and that my head wouldn't cover the spot. First a smaller number two, two millimeters (about 5/64 in), made some down cuts all around. The cuts weren't aggressive. Just little by little, attacking from both sides.

Then came the work at the bottom of the dial. Beneath it I could feel the wood fighting me, because I was at the grain. So I grabbed the half millimeter and dug an even deeper channel right underneath the little stem, or whatever you're going to call that connecting thing. Then, on the opposite side, the same tool went in again, flute upside down, kind of hook, hook, and hook out.

Right between those two grapes, a little deeper excavation gives a clean, clean cut. From the opposite side I dug a little more. I wasn't forcing it, and I wasn't cranking on this one either, because if I crank, I'll break it. On camera I first said I'd be able to, then caught myself. I shouldn't say that. I'll break it.
Later a small gouge of one millimeter (0.04 in or so), flute down, for an even deeper excavation. I wanted all that mess inside gone. Then I got ready on the other side and drilled through, a wiggly pass going down, until I was through. The half millimeter went in after it, from one side, then the other.
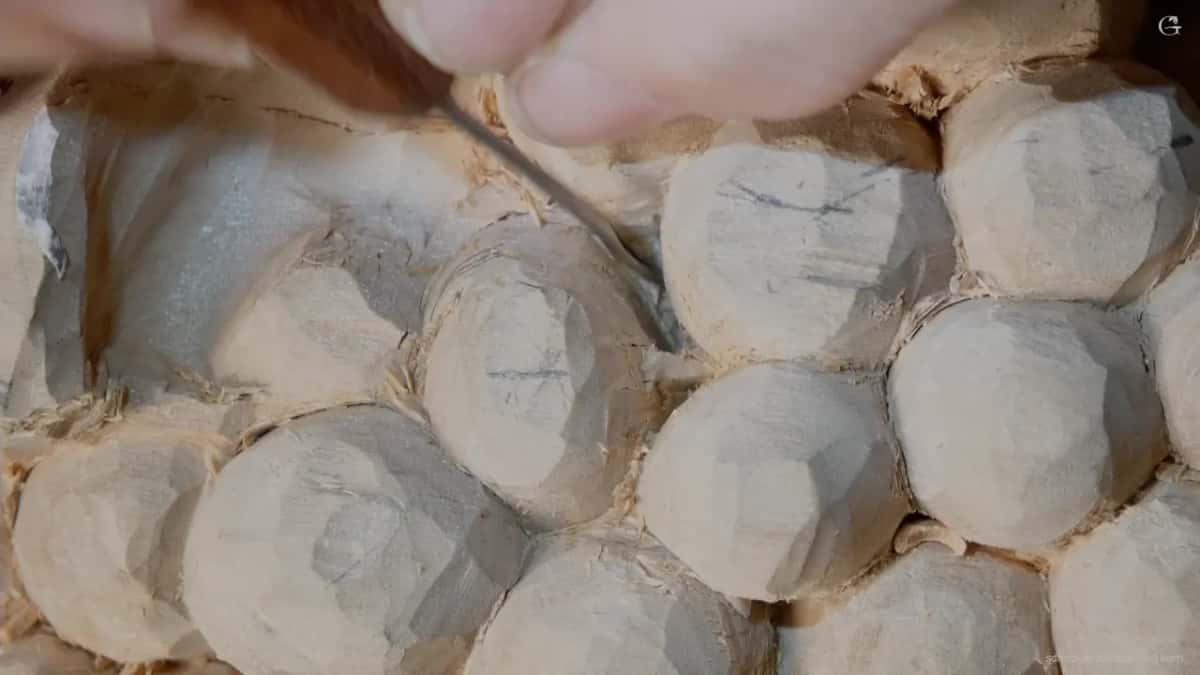
Right then I said I probably should have used a small tiny spoon. I showed you one on camera. It gets right underneath, and you can see how quickly all that waste comes out. That would probably be the best tool to use there, and if you can find one, it is a really good tool to have.
Where does the flute point to clean the side of a grape?
Outward, to approximately three o'clock, three thirty or so. Below the stem the number two went right underneath again, and I cleaned the side of that grape using that same tool, flute turned out, going underneath that way. There was a lot of mess by then. You probably couldn't see it, I said, because the camera wouldn't zoom more than that. That was the closest I could get for you.

Cleaning up that way, flipped over, shows up in other lessons too. In lesson 9, the small tiny number three cleaned an undercut while turned over, going to the edge, then a tiny number 11 went in to hook out the mess the number three had made. Back in lesson 5 it was a flatter number three, a quarter of an inch (about 6 mm), upside down, getting rid of some of the mess while I kept that part somewhat thick.
Should the flute face the grape for the joint?
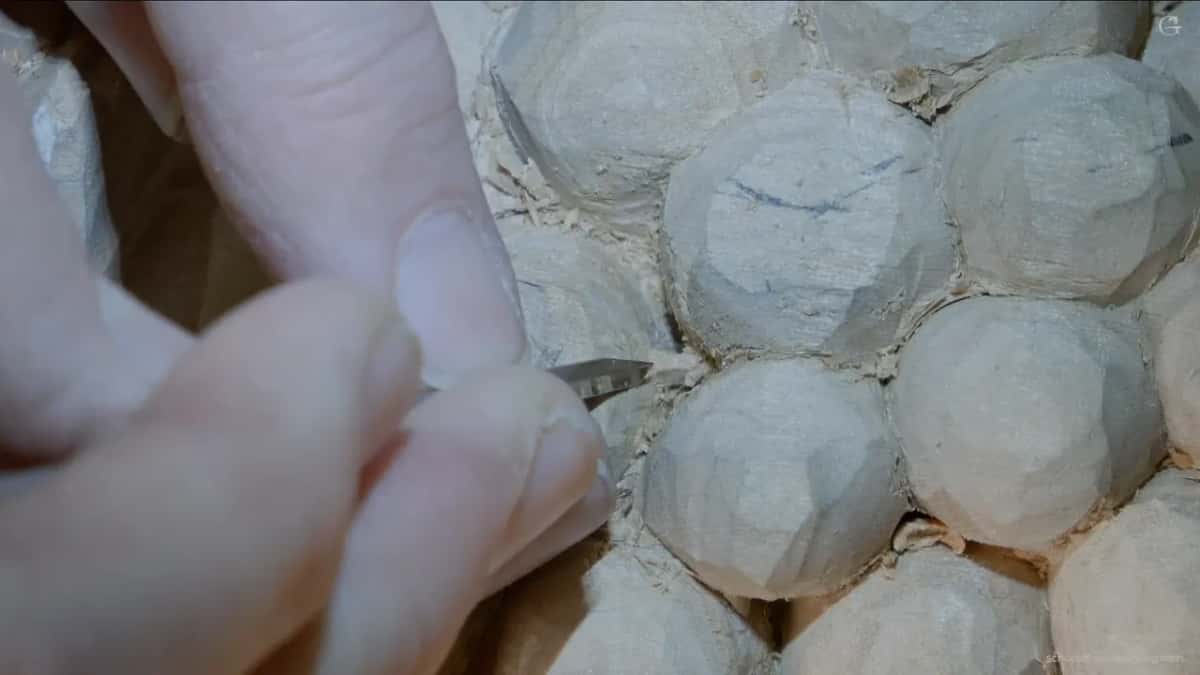
Here it did. To make a connecting point, I carved with my flute toward the grape, using a 2 mm number two, a little bigger than a sixteenth of an inch. Then small chamfer cuts went out from that point. When you look at real grapes, they do have a kind of connecting point, where the connection comes down and joins the grape itself. Hope it makes sense, at least some of the sense.

Botany has a name for that little stalk. A pedicel is what attaches a single flower, or a fruit, to its stalk, and grapes grow in clusters of 15 to 300. On a chamfer the edge is simply cut off at an angle, and mine were small, tiny ones. I didn't want to cover them with my head for the camera.
For the next bit I said I could maybe find a one millimeter (roughly 0.039 in) number two or number three, or that number nine, or even the half millimeter, and excavate toward those two grapes with the flute down. A plan, said out loud.
How thin can a stem get under these small gouges?
Mine came to about a sixteenth of an inch (about 1.6 mm). And I was not too happy with how deep I had dug at that point, and a little deeper would have suited me. But I have to keep an eye on how tall the detail is, because I don't want to excavate too much and then regret it.
So I stopped there. That was enough for that little thing, at least in that area. Maybe I'll add one somewhere else. On the Cabernet tray I planned one stem at one eighth of an inch (about 3 mm), maybe three sixteenths (about 5 mm), just to make it a little more stable.
When does upside down stop working?
Every so often it just doesn't work, and then I switch the tool back to the normal position and shave. Lesson 9 is where I said so, while a number three blended a bulge with its back up. Present your tool at 45 degrees and shave it, I said. Don't worry about digging in. The goal was for it to look really nice and bulgy.
Turning the tool over to round a shape is the other use, and there is a page on that from a Venice Room ceiling, workshop 40. Elsewhere in lesson 5 a number seven dropped a spot slightly, and then I flipped it to get a bulging part right there. Wood carving is not really a replica of real life, I said that day. It's more like interpretation.

Is the upside down habit only for tiny tools?
Bigger gouges go over too. The leaf in lesson 8 got a seven millimeter number 11 (a little over 1/4 in), flute about six o'clock, making small, small cuts of approximately a millimeter (about 1/25 in) at a time. Careful, because I didn't want to break what I had worked on before. Slicing, slicing, slicing. Then the same thing on a smaller scale, with a two and a half millimeter (about 3/32 in) number 11, for the subdivisions.
A number five of a little less than half an inch, about 12 millimeters, made an upside down cut in lesson 5, straight down and then slightly undercut right away. If one pass couldn't take it, I went back and made more, and after that a number 11 could go in and excavate the area. And near the end of lesson 4, once I was through, I switched to a number nine and dug, flute turned under, to get all the way, and then it was ready to clean.
| Tool | Flute and job | Where |
|---|---|---|
| Tiny number eleven | Flute down, hooked waste out from under | Stem, lesson 13 |
| Small number two | Outward, three o'clock, cleaned the grape's side | Same stem here |
| Larger number eleven | About six o'clock, a millimeter per pass | Leaf, lesson 8 |
| Flatter number five | Turned over, exaggerated the undercut for shadow | Lesson 8, later |
| Number nine gouge | Flute under, after it was already through | End, lesson 4 |
| Small tiny three | Cleaned an undercut, the tool turned over | Late, lesson 9 |

What came after the stem in this part?
Right after it, a grape that had grown too wide. I picked up my pencil. That side had to be chopped, because a grape is not supposed to look wider than it is long. Then the magnifying glasses came off, and a wider number two, 10 millimeters (about 3/8 in), chopped that side straight down. I started shaping it. Still a little too wide for my taste. My next aim was to make it a little smaller. All of it sits on one piece of relief work, carved from the same board.

Would you like to see the dial turn under that stem, pass by pass, from the closer camera? Then come carve the whole grape onlay with me in the full lessons, and turn your flute down the first time your edge goes under.
How it's done
- Make small down cuts. I take a smaller number two, 2 mm (just over 1/16 in), and make down cuts around the stem, attacking it from each side.
- Turn the flute to six o'clock. Upside down, one of my two tiniest tools starts digging right beneath the stem. Carefully.
- Hook from the other side. The tiny number 11 goes in from the opposite side, flute still down, and I hook the waste out.
- Clean the grape's side. My number two goes underneath again, flute facing out at about three, and cleans the grape's side.
- Go through with a wiggle. A 1 mm (a twenty-fifth of an inch) gouge clears the mess inside, and I wiggle it right through.
- Point the flute at the grape. Aiming the number two at that grape, I start the connecting point, then small, tiny chamfers.
Frequently asked questions
Does the clock on a gouge move with the carving?
Mine goes by the detail. In lesson 11 I told the camera my flute was upside down to roughly six o'clock, relative to the detail, of course. After that I flipped it and went in again on the other side, and at the end my connecting points were still there.
Can a gouge undercut where a veiner won't fit?
On lesson 5 there was no way a number 11 fit in one spot. I turned my tool upside down instead and undercut with it, using it a little differently, and in less than a minute the piece was airborne. Slightly raised, yet it cast enough shadow.
What happens if you crank a gouge beneath a stem that thin?
On this grape onlay I'd break it. I told you I was not forcing and not cranking on that stem, then corrected my own words right there on camera, because a crank would break it. Small passes, each side in turn, and the stem was still whole when I moved on.
What to carve next