

Alexander Grabovetskiy, woodcarver, School of Woodcarving · Published 2024
How do you undercut with a veiner?
Quick answer: Undercutting with a veiner is taking wood out from under a thin carved part, using the number 11 that drew its outline. On my grape onlay a 2 mm (about 5/64 in) veiner went in beside the part, then tilted and twisted under it, working one side and then the other, until it showed through.
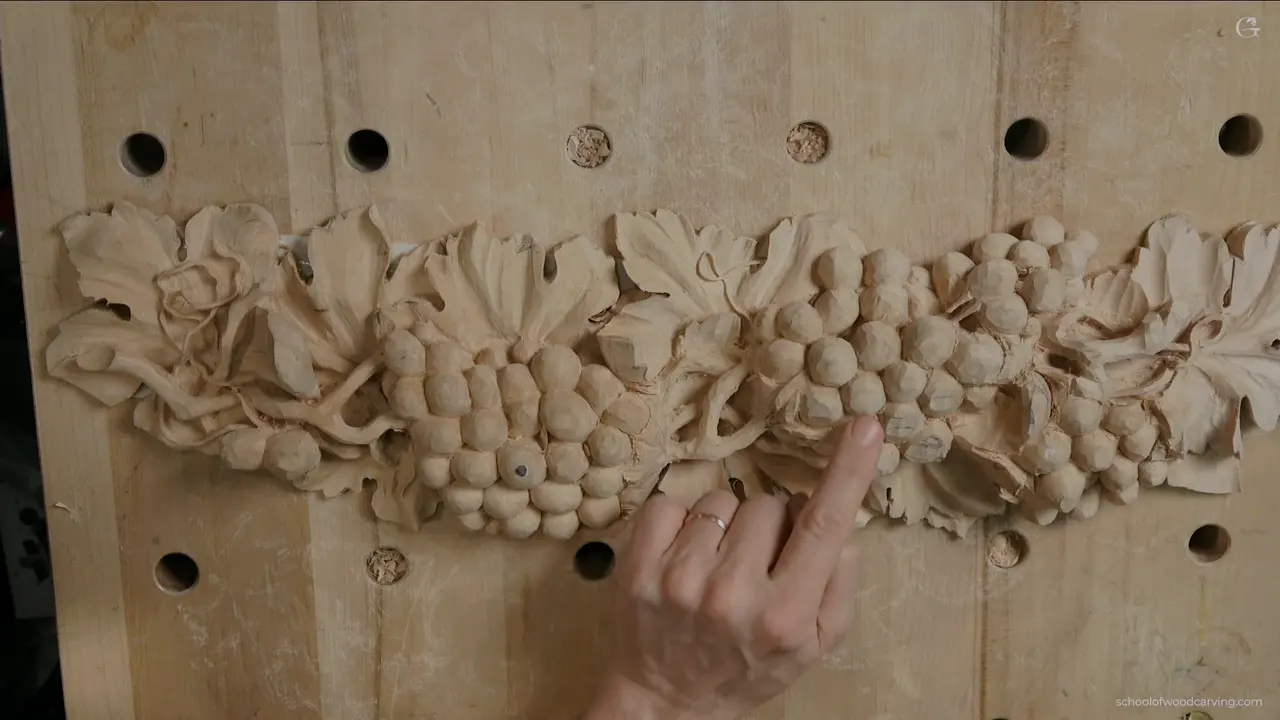
A veiner gouge undercut is wood taken from beneath a thin part by the number 11 that just drew its outline. On my grape onlay, in part 1 of lesson 10, that tool was two millimeters, a bit over 1/16 inch. I went down next to the part first. After that I tilted the gouge, twisted it, and slipped it under, first from this edge, then from that one, until the part was free on the far side.
Would you like a thin part of your carving to float, with a little shadow under it? Would you like to get there with one small gouge? Then let the gouge that outlined it go under it too. I will show you the order I went in on this panel, how deep I went before the tool went under, and the small spoon that cleaned up after it.
My undercut on this panel, the short version
- Tool number one was a number 11, a favorite of mine, and it outlined the part first.
- A flatter number 3 took that area pretty low.
- Both sides of the part went down before anything went under it, so the opening would have room to happen.
- The veiner went under next, tilted and twisted.
- Once it was showing on the far side, I had my opening, small as it was.
- Under it, a small number 3 spoon got right underneath and cleaned up what the veiner left.
Why does the outline tool also go under?
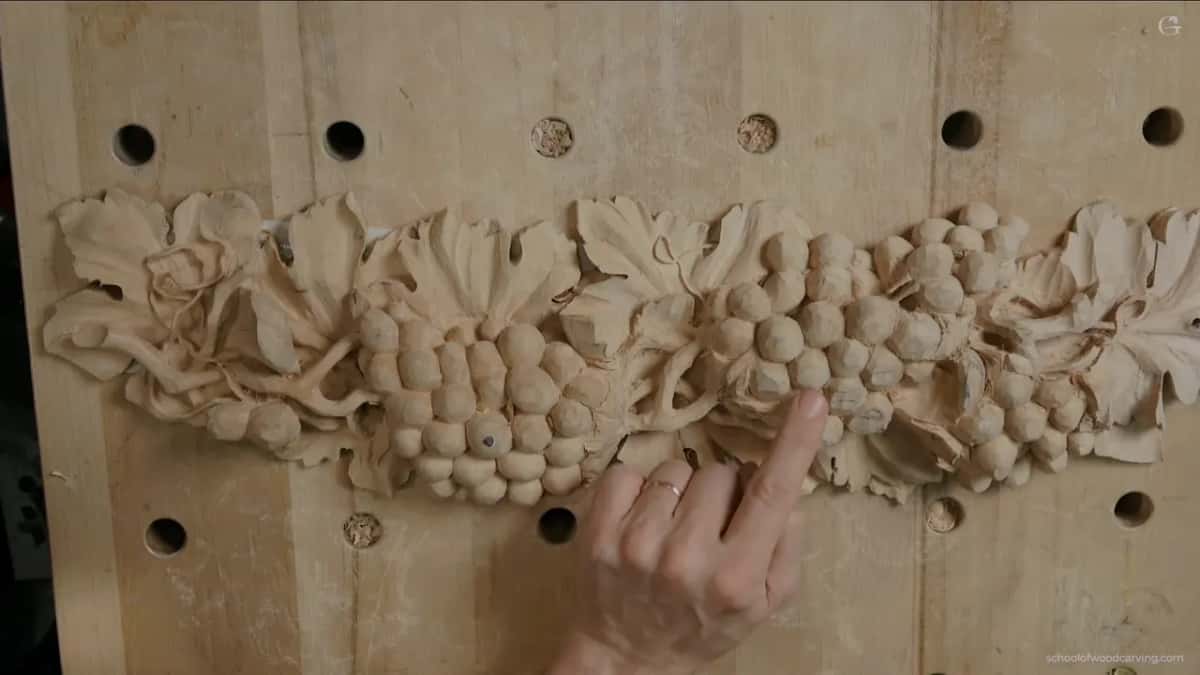
Here one number 11 handled both jobs. The spot sat in the center of the piece, where I have some complex movements. Step number one was to get rid of the mess there, because some material was left and a movement runs below it. Tool number one on this part was one of my favorite tools, a number 11 veiner. Like always, I just outlined first. This part ties one section of the panel to another piece, and it goes right underneath, below a grape. So while I outlined, I kept an eye on how it runs from underneath, because I wanted to make sure it's connected.

My Hashemi flower, in lesson 49, went the same way. Number 11 again, the outside established first, and the very same gouge undercut it. The next video of that flower had me say go as deep as you can. In some spots a number 8 did the undercutting, and then I went back to the number 11.
Back on the grape panel, in lesson 11, I called it my favorite again. As always, my favorite number 11, five millimeters that time, or 3/16 inch, for outlining. A video later in that lesson I said it is still the number 11 I like, a 2 mm (0.08 in) German one, also a really good brand. What else a number 11 is good for is its own question, and a Roman acanthus lesson takes it up.

How far down do you go before the gouge goes under?
Far enough to make room, and no farther than the wood below allows. First I had to lower that part, and pretty low. So I took something flatter, a number 3 of about a quarter inch in this case, about six millimeters, and went this way and that way.
I wanted the opening to be visible, so you can really see it. That means this piece goes airborne. Can I do that? I thought I had some of the material, and I needed to attack from this side first. I attacked from one side first, at least three sixteenths of an inch from the surface down. That way I have some room to create the opening. I can't do too much, because I have a grape below. The other side got about the same. When I looked again, I had about five millimeters (3/16 in) down.

My Byzantine acanthus, lesson 2, had leaves that were not to go lower than 10 millimeters, about three eighths of an inch. Eyeball it, I said, you don't have to measure. Same thing over on that side. We're going to leave room for undercutting, to create an even deeper effect with the shadows, so it looks light. Those were acanthus leaves.

Leave too little and the gouge has nowhere to go. I angled my number 11 a little on the lily box, lesson 3, for a slight undercut, and did it again on the far side. But I couldn't do too much. My tool would not fit, even a small one, half a millimeter (about 1/50 in). A slight angle still gave me something. On one side I could go a little deeper, and after that the two stems got their roundness.

How do you tilt and twist a veiner gouge under a thin part?
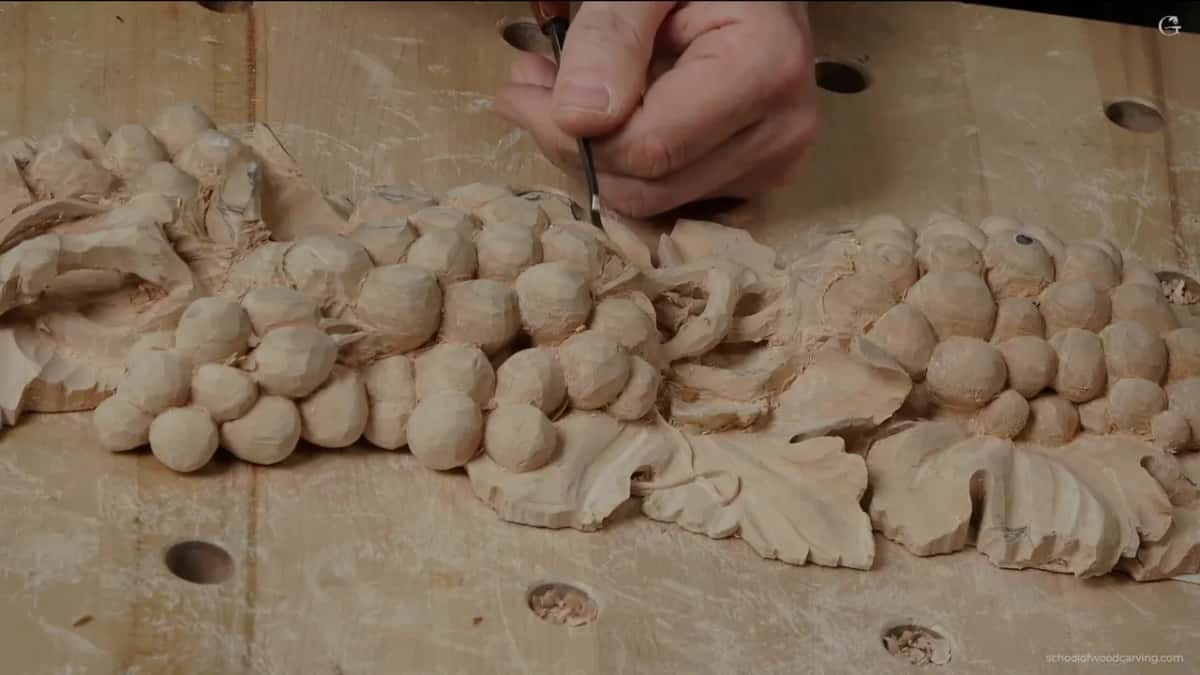
Carefully, with the tool that did the outline. There are a couple ways to do it. For this part I took that same veiner and went slightly, right underneath, like so. Then tilt, twist, and start undercutting, careful the whole time. Earlier in this course I showed you how to use a number 11 for this kind of separation. Seconds later I said it out loud. Oh, yes, it's fragile. Gotta be careful.

Lesson 4 is where I put that tilt into words. I lay my tool on one of the sides, a number 11 of two and a half millimeters (about 3/32 in), and my wing goes to about 10 o'clock. From there I start excavating right underneath, little by little, from one angle. The clock face is the easy way to say where the corner of the gouge points.
A half millimeter number 11 (0.02 in) went under one spot on the furniture panel, lesson 29, with my flute at about 11 o'clock, and then I rotated the flute round to ten. Relief carving uses the same word, undercutting, for wood taken out from under a raised form.

Why take a little from each side?
The part is fragile. So what I'm doing, I'm taking out a little from that part. Then I'm taking out from this one. The far side gets the same, and I just undercut. You can see it already showing.
Earlier, in lesson 4, I said it plainly. I'm gonna attack from both sides, from one side and from another side. In that same video I told you it is better to attack it with the number 11, and to be careful not to crank against that part, because it's fragile.

Grain can make a spot dangerous. Workshop 27 of the Venice Room had me start with a 7 mm number 11, about 0.28 in, to see whether it would work or not. Be careful, I said, and just attack that from this side. It was a dangerous area. I was going against the grain, and the grain was going up, so I could catch it, split it and break it.
How big does the opening have to be?
Big enough to see, and mine was not big at all. I've got my opening. I know it's not a big opening, but every little bit helps. Again, it is not a necessary detail at all. People probably won't even notice that, but it's just for you. In this case it was just for me, to take something extra, and then it is completely airborne.

A small undercut still gives shadow. During lesson 22 of the furniture panel, a 1 mm (about 1/25 in) number 11 went underneath a flip to create an even deeper shadow. Not much, because the final form was not established there yet. But I still wanted to see that shadow. One video later I went under again with a smaller one. It is not like going really, really deep underneath, but it still creates extra shadow.
Rich shadow, I said in the Venice Room, workshop 54, because it is not just a simple hole. It casts a shadow on both sides, this one and the right-hand one too.
Painters call this play of light against dark chiaroscuro, and a hole carved right through a piece is the old idea of openwork. The opening on this onlay is a small one.

What cleans under the part once the veiner is through?
A spoon gouge of some kind. Let me think, I said, and then took a small one, a number 3 of one eighth of an inch (about 3 mm), and it's a spoon. With it I can get right underneath and clean it. It could be a number 3, I said, or it could be a little different tool. Can you see how it goes right underneath? Both the spoon gouge and the veiner show up among the usual tools of wood carving.

With the Hashemi flower, I took a half millimeter number 11 (under 1/32 in) really deep, and then I said maybe a number 3 could clean it. I know some carvers use just flat gouges for that type of work. A number 3 can be used a lot, but I think it kind of limits it. With that number 3, I can't do too many movements.
The number 11 in lesson 5 of this course was itself a spoon, 7 mm (just over 1/4 in). I needed to attack from inside outward there. Carve the other way and I'd catch the grain and damage it. And on the lily box, lesson 7, a tiny number 11 undercut a detail with the help of a mallet, which was easier for me. Later that same tiny tool cleaned all that mess out.
When is it too early to undercut with a number 11?
Before you know what you want. I said in workshop 51 of the Venice Room that I'm going to use the number 11 under there later, but it's too early right now, since I still had to figure out what I want to see with that part. In workshop 47, a number 5 right away would have been a mistake. I need to separate first, before I develop it. That area has to be undercut, and I said I would go deeper later on.
Even on this grape panel I held back once, in lesson 4. Looks like I have plenty of material, I said, but I'll leave it for now and not excavate all the way right underneath, because it's fragile, kind of a weak spot, and the grain direction goes that way.
Back on the furniture panel, that half millimeter undercut came to maybe three millimeters, about an eighth of an inch, and it gave a really beautiful effect. I could do the same with that tool in another spot, though maybe not right away, since a center convex and a couple of concaves on the side were still to come.

The same order shows in workshop 54. Before I undercut right there, I needed to develop the right-hand side. Finished details stayed off that main movement for the moment, as I still sometimes can hit the edge and break it. Workshop 94 was no different. In that one I wanted everything to be the way I had pictured it before any undercut, and I held off there to establish the micro-movements on the inside first. That order held on the grape onlay too. The flatter tool lowered the area, both sides went down, and only then did the veiner go under.

Which size number 11 went under what?
I don't keep one size for undercutting. Here is what the number 11 did on the pieces quoted above, in the order they come up on this page. One inch is 25.4 millimeters, and the inch figures are rounded.
| Where | Tool | Note |
|---|---|---|
| Onlay lesson 10 | tilted, twisted under, 2 mm (5/64 in) | until it showed through |
| Grape onlay 4 | from both sides, 2.5 mm (3/32 in) | wing near 10 o'clock |
| Same course, 5 | spoon, inside outward, 7 mm (9/32 in) | I'd catch the grain |
| Lily box 3 | angled a little, 0.5 mm (1/50 in) | a slight undercut only |
| Furniture panel 22 | under a flip, 1 mm (1/25 in) | an even deeper shadow |
| Venice Room 27 | this side, carefully, 7 mm (9/32 in) | a dangerous area there |
Which tool gives the cleanest undercut is its own question, and the June 2020 livestream answers it. This whole job happened with the board taped to my bench, and the tape has its own story on the lesson 10 page. My other job waited behind me in that video, shades for a pipe organ, all going to be gold leaf. The fruit on this board is a grape, Vitis to a botanist.
Want to watch the gouge tilt and go under, pass by pass, with the camera right on the part? Part 1 of lesson 10 is inside the school with the rest of the grape onlay, and Tuition and access are on one page.
How it's done
- Outline with the number 11. Mine was my favorite veiner. Outline first, like always, and watch how the part runs underneath so it stays connected.
- Lower the area with something flatter. Take something flatter, a number 3 near 6 mm (1/4 in), this way and that way, pretty low.
- Go down on both sides. Five millimeters or so on each side, about 3/16 in, gives the opening room. A grape sat below mine, so I stopped there.
- Tilt and twist the same veiner under. Slightly, right underneath. The part is fragile here, so be careful.
- Take a little from each side. A bit from one part, a bit from the next, then the far side, until it shows through.
- Clean underneath with a small spoon. Mine was a little number 3 spoon, about 1/8 in (3 mm), and it got right under. Another tool could do it too.
Frequently asked questions
What size number 11 did you use under the grape onlay part?
Two millimeters, roughly 0.08 inch. The number 11 I like best went first on that part, and it drew the outline before anything else. The same gouge then went right underneath, working in from either edge, until I could see the opening.
Why go down beside the part before undercutting?
Room. I took each side down at least 3/16 of an inch, roughly 5 mm, so the opening had somewhere to go. A grape sat below that part, so I could not take much more. Only after that did the veiner go under.
Where should the corner of a veiner point when you go under?
My wing went to about ten in lesson 4, with a 2.5 mm number 11, close to 0.1 in, laid on its side. On a furniture panel my flute sat near eleven, then I turned it round to ten. Go little by little.
What to carve next